

Taking good photographs with an inexpensive telephone, however, is usually a problem. I used to be reminded of this after taking part in with the Moto G14 for a few weeks, and whereas I believe it’s an okay telephone for its $150 worth, I don’t see it profitable awards for its digicam capabilities. It’s protected to say that the latter applies to all different low cost, entry-level telephones.
However there are methods to take good photographs with an inexpensive digicam (or no less than non-terrible ones). No, there’s no secret, magic trick that may make a $150 telephone take photographs like the newest iPhone, Galaxy or Pixel telephone, however there are issues you are able to do to attenuate the digicam limitations typical for a digicam on an inexpensive telephone.
Tip #1: Be nonetheless, be affected person
There’s no approach round it: cheaper telephones are slower general, and so are their cameras. There’s prone to be a major delay between the second you press the button and when the picture is definitely taken (a.ok.a. shutter lag), and the shutter sound you hear shouldn’t be all the time a dependable indicator that your digicam is finished taking the shot.
In different phrases, it’s a must to be affected person when taking photographs with low cost telephones. Give them an additional second after you press the button to make sure you don’t find yourself with a blurry mess. Disabling options like HDR or AI enhancements ought to velocity issues up, however picture high quality is prone to be affected too.
Tip #2: Know all of your digicam shortcuts

Talking of velocity, low cost cameras are additionally sluggish to open. That’s the reason it’s a good suggestion to know each attainable digicam shortcut your digicam gives.Some Android telephones can have their cameras opened from stand-by or any display with a double press of the facility button – a shortcut that’s both obtainable within the digicam settings or is enabled by default. Motorola telephones have their very own distinctive strategy – you’ll be able to open their digicam apps with a fast double twist of the telephone.
In any case, understanding your digicam shortcuts offers you these further few seconds of time that would make the distinction between taking the shot and lacking it.
Tip #3: Digicam settings
Decision – My Moto G14 has a 50MP digicam, nevertheless it takes 12.5MP photographs by default. I assumed that switching to 50MP mode would give me higher-quality photographs with extra element, however as an alternative, 50MP photographs appeared worse.
That’s as a result of the Moto G14’s 50MP digicam makes use of pixel binning – a now-common digicam function that teams neighboring pixels to make use of them as one bigger and extra delicate pixel. This digicam is optimized for taking 12.5MP pictures, and switching to 50MP mode reduces its already weak gentle sensitivity.
Your expertise might fluctuate if in case you have a unique telephone, but when it makes use of a digicam with 32MP or extra, it’s seemingly higher to stay to the advisable (default) picture decision.
AI Optimizations – Some telephones include built-in software program that acknowledges what you’re taking an image of and tries to optimize the digicam settings for the scenario. Each model’s algorithms are totally different, so once more, your expertise might fluctuate, nevertheless it’s not inconceivable to finish up with a photograph that’s objectively made worse by exaggerated colours and distinction – simply have a look at these radioactive tomatoes within the image under!
No matter telephone you’ve gotten, attempt to disable any AI scene optimizers and see in the event you’ll just like the clear photographs higher. As a bonus, turning these off would possibly velocity up your digicam app. And in the event you choose the “optimized” photographs with further shade and distinction, that’s tremendous too.
HDR – Excessive Dynamics Vary mode is a function that improves element within the brightest and darkest areas of the body. It’s nice having it on for improved picture high quality, and I’d advocate leaving it on always. It could noticeably decelerate the digicam app on cheaper telephones, however I believe the enhance in high quality is definitely worth the lag.
RAW – These days, even some cheaper telephones have a RAW format possibility of their digicam apps. This can be a setting that tells the digicam to avoid wasting an uncompressed model of the picture alongside the compressed, JPG variant.
The draw back of RAW photographs is that they take up a lot of house, sluggish your digicam down, and require specialised software program like Adobe Lightroom to open and edit. However the upside is that modifying a RAW file your self could also be your finest likelihood at getting the highest-quality picture out of your telephone’s digicam, particularly in case your digicam app’s algorithms go overboard with the sharpening, distinction and saturation dials. It’s no silver bullet, however the RAW possibility is value testing in the event you don’t thoughts modifying photographs your self to get the precise look you need.
Tip #4: Digicam modes
Evening Mode – Likelihood is you’ll discover some sort of an evening mode on most of right now’s telephones. Thankfully, this one tends to work even on cheaper {hardware}, however chances are you’ll have to activate it manually when it’s wanted. Use it each time you’ll be able to – even for reasonably lit scenes indoors or outdoors at sundown. When can you employ evening mode? Effectively, it really works by taking a number of exposures in sequence after which stacking them to provide a clearer, brighter picture. Its disadvantage is that it requires you to maintain the digicam nonetheless for a number of seconds, and taking photographs of transferring topics is out of the query.
And once more, it doesn’t need to be evening for Evening Mode to be helpful. So long as you’ve gotten a static scene and also you don’t thoughts the wait, your telephone’s Evening Mode would possibly carry out even higher than its HDR algorithms.
Guide/Professional mode – Sorry to say it, however handbook digicam settings can do little or no to compensate for low-quality digicam {hardware}. They may, nevertheless, make up for struggling digicam software program. After all, it is impractical to shoot in Professional mode solely, however handbook settings would possibly enable you to get a greater picture in difficult conditions.
For instance, right here’s a shot I took on my Moto G14. Its digicam could not set the correct colours because it received confused by the nice and cozy glow of the flame. On the similar time, The autofocus received thrown off by a reflective puddle of candle wax. So I swiftly switched to Professional mode to set the main target and shade temperature manually. The outcome was a sharper picture with correct colours.


Auto mode – inaccurate colours and focus. Guide mode – correct colours and sharp focus.
Zooming – If in case you have an inexpensive telephone, the perfect kind of zoom is together with your legs. If attainable, get nearer to your topic as an alternative of counting on digital zoom or on an inexpensive, fundamental telephoto digicam (in case your telephone has one in any respect).
Bonus suggestions
Clear your lens – nearly each time somebody arms me their telephone to take an image, I have a look at their digicam first. 9 out of 10 instances it’s lined in finger grease, so I give it a mild wipe with my sleeve. Smudges on the digicam lens trigger gentle, hazy photographs, particularly on cheaper telephones which can not have a particular lens coating to forestall them.
Maintain your horizon straight – following this fundamental composition tip will enhance your photographs in a delicate approach. That can assist you preserve your digicam horizontal, allow the grid function and use it as a information when composing your shot. Pictures will also be simply straightened in Google Pictures after they’ve been captured.
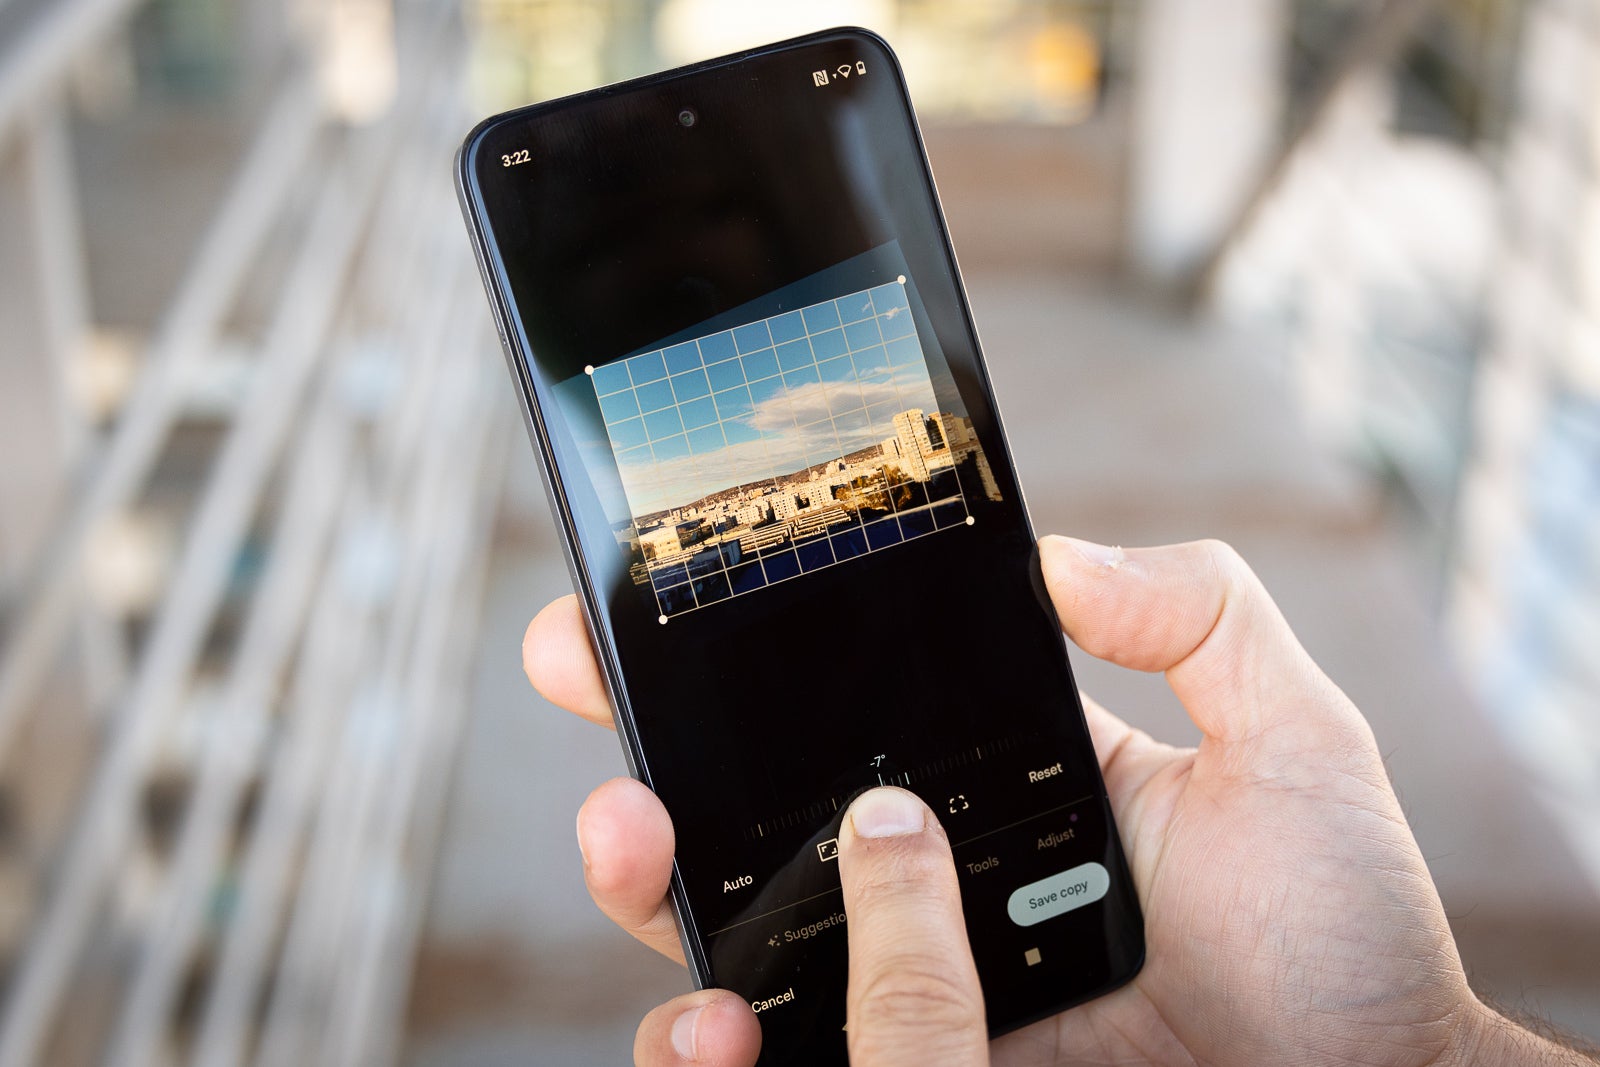
A horizontal picture is a greater picture. Picture credit score – PhoneArena