

The DJI Air 3 is a flexible drone that caters to everybody: these new to flying drones, fans, content material creators, and professionals.
What makes the Air 3 such a well-rounded drone is its 12 MP and 48 MP images, twin cameras, and high-resolution video capabilities.
For many who want various sizes of storage to accommodate larger-sized content material information, or want to take screenshots or display recordings of their DJI RC 2, the Air 3 can simply accommodate you.
This text and the included YouTube video can be a step-by-step tutorial strolling via inserting, ejecting, and formatting the micro-SD card, for each the Air 3 drone and the DJ RC 2.
Inserting the Micro-SD Card (Air 3)
As DJI drones progress and enhance over time, they’ll accommodate larger-capacity SD playing cards.
It appears only in the near past that the 64 GB SD playing cards within the unique Mavic Professional have been too giant to fill. As media file sizes get bigger and bigger, the Air 3 can retailer images and movies on SD playing cards as much as 512 GB.
To insert SD playing cards into the Air 3:
STEP 1: Be sure the Air 3 is powered off.
Whereas holding the Air 3 in a single hand, open the USB-C and SD card port.
Rigorously insert the SD card into the Air 3’s SD card slot, with the gold pin set pointed up (in the direction of you). Don’t push the cardboard in all the way in which simply but, as it will probably eject and fly away from you.

STEP 2: Whereas the SD card is within the slot, utilizing your fingernail at a slight angle, push the SD card in till it makes an audible “click on”.

As a result of the SD card slot is spring loaded, if you happen to don’t press the SD card in with a nail at a slight angle, your finger might slip, inflicting the cardboard to drive eject and be misplaced.
Inserting the Micro-SD Card (DJI RC 2)
Should you personal the combo with the DJI RC 2, you’ll see that there’s additionally an SD card slot within the distant controller as nicely.
The SD card on the DJI RC 2 is at the moment used for storing screenshots and display recording clips. Time will inform if DJI provides extra gadgets that may be saved to the SD card.
To insert an SD card into the DJI RC 2:
STEP 1: With the DJI RC 2 powered off, partially insert the SD card into the DJI RC 2 SD card slot, this time with the gold pin set pointed down or away from you.
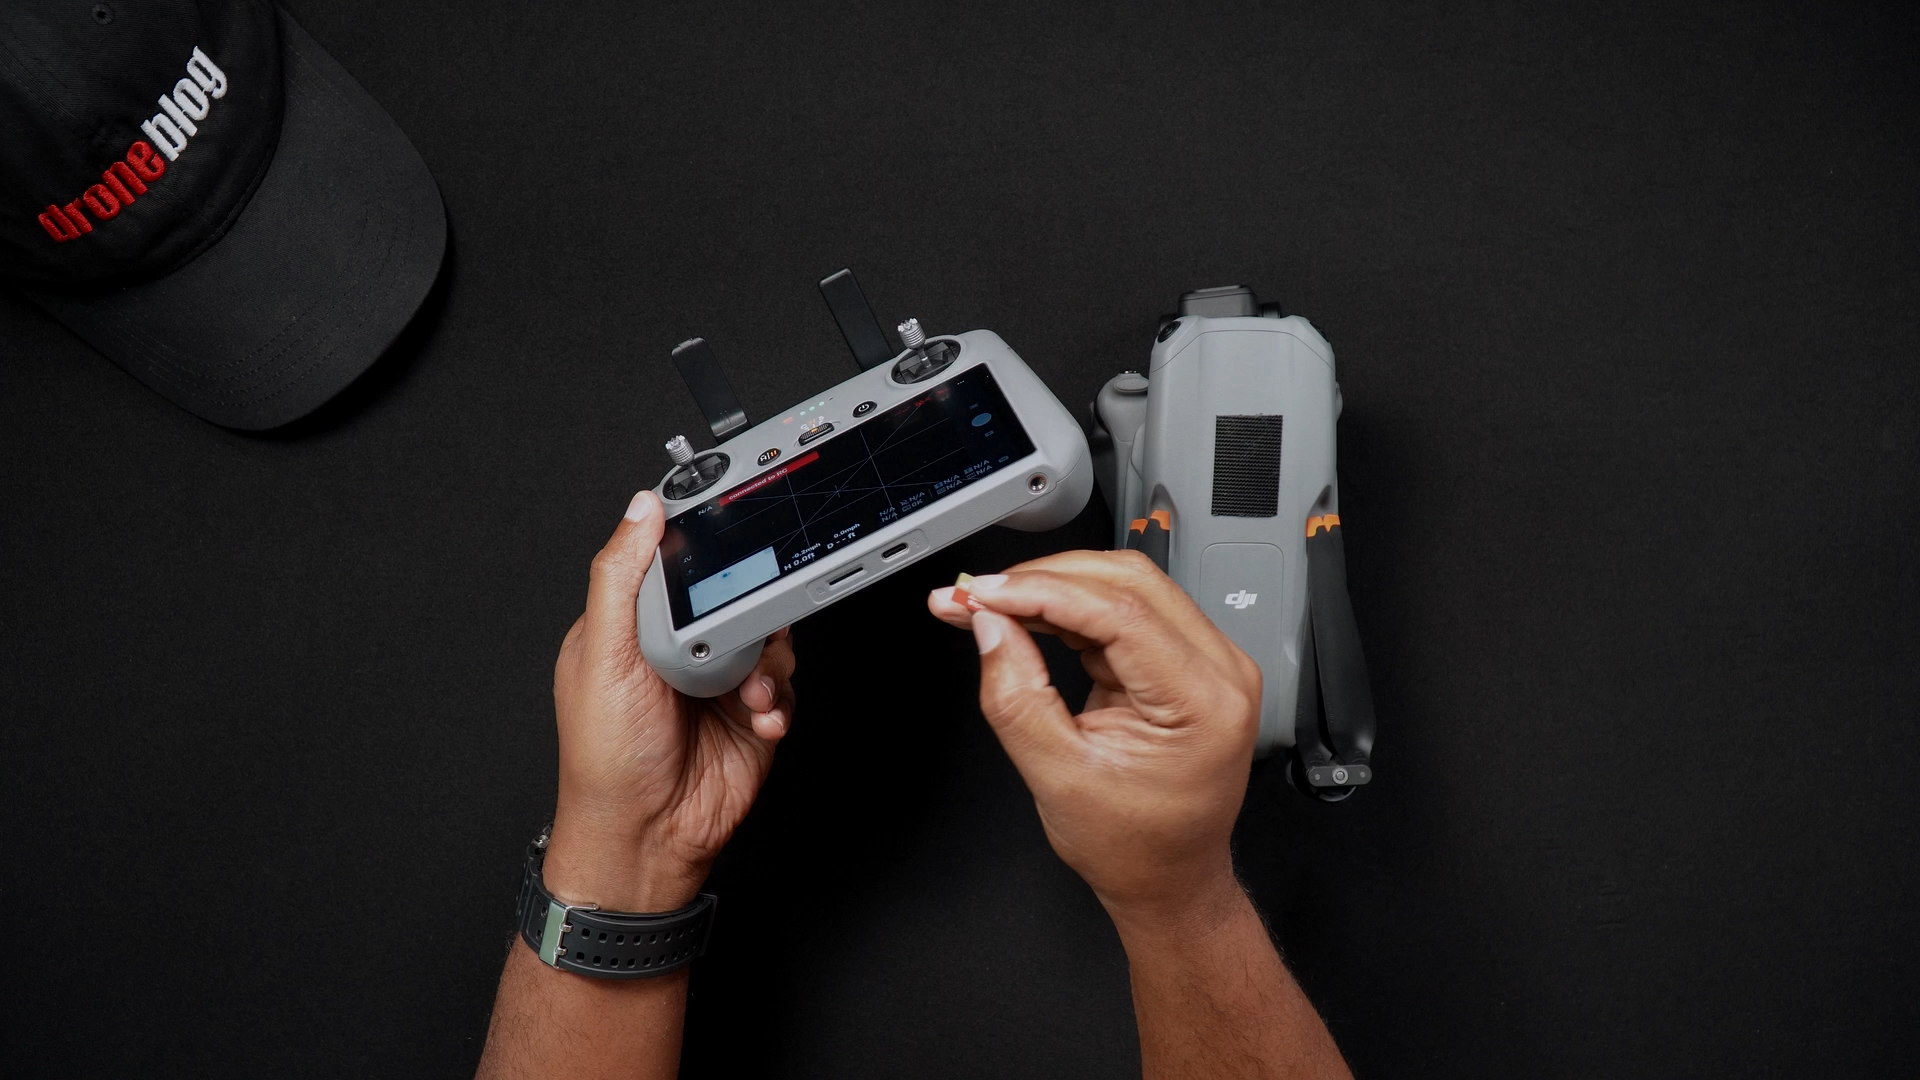
STEP 2: Push the SD card in till it makes an audible “click on”.
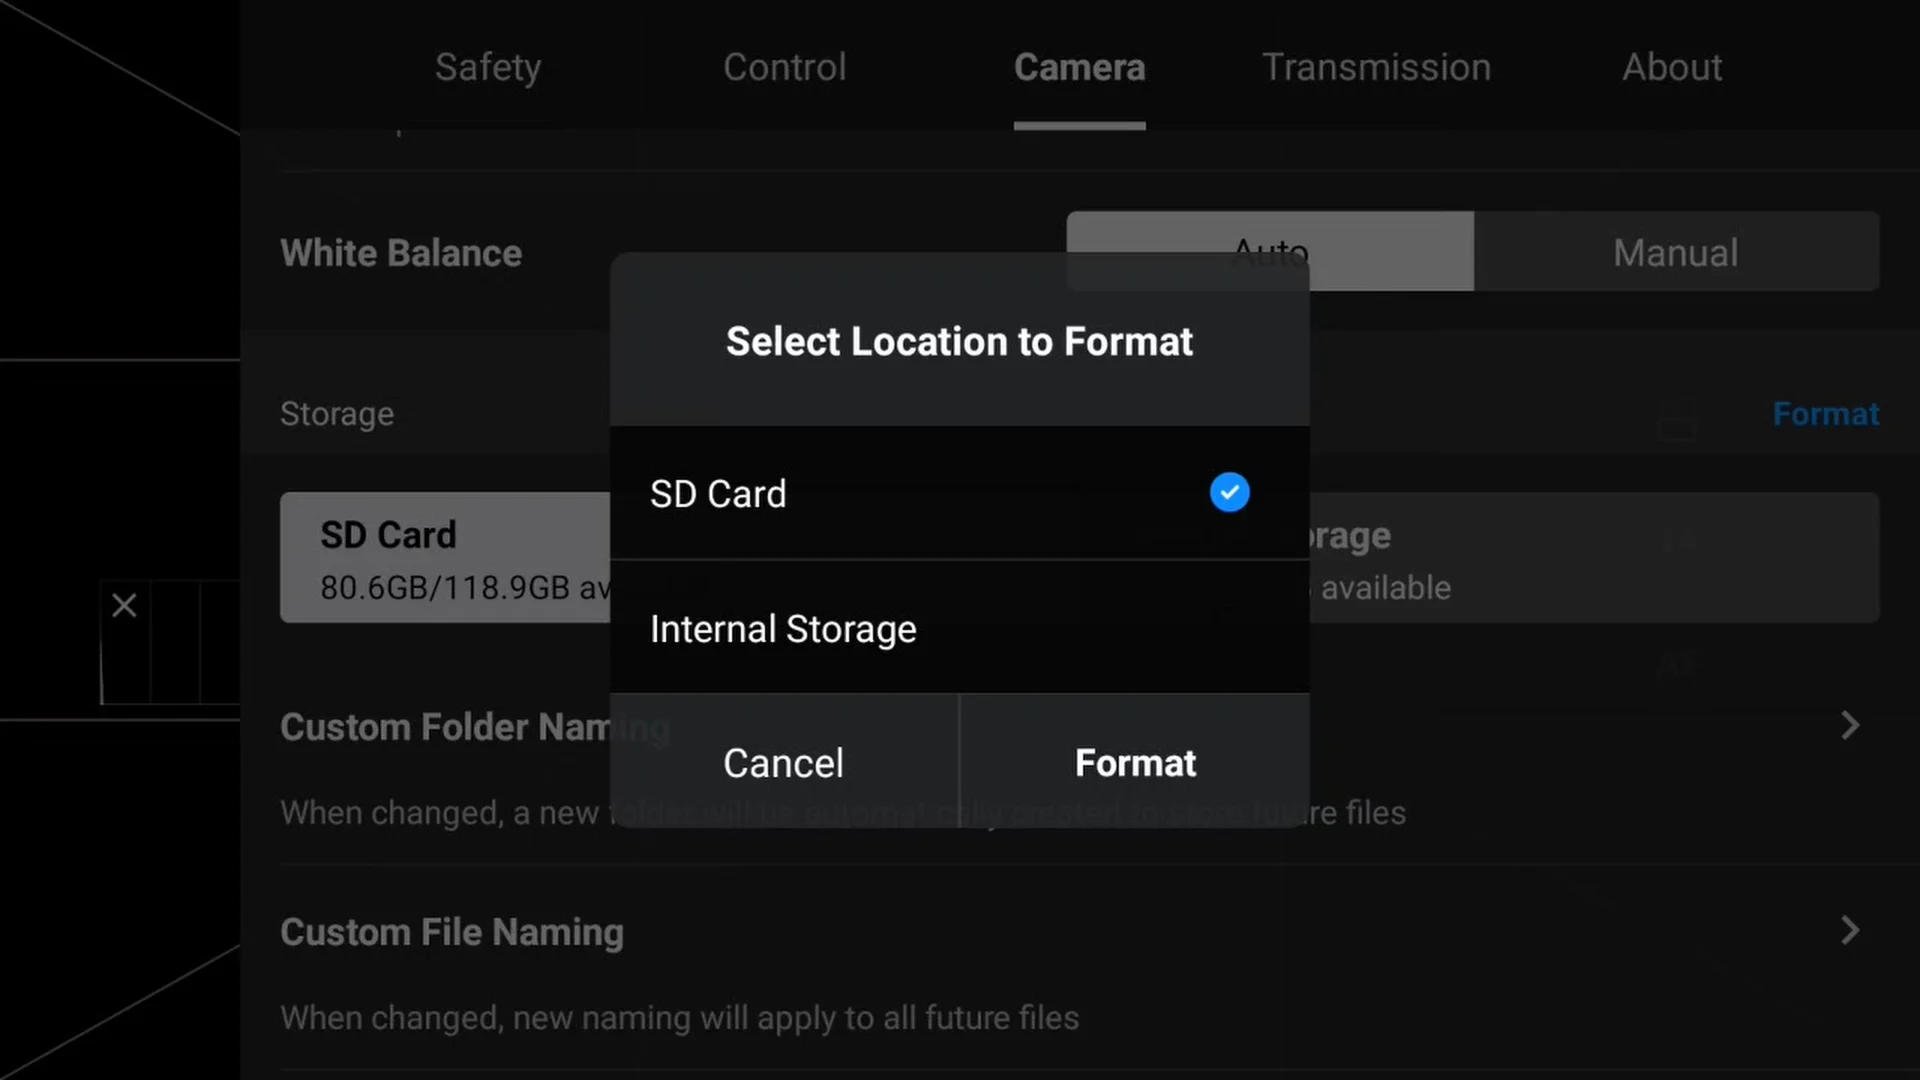
Formatting the Micro-SD Card (Air 3)
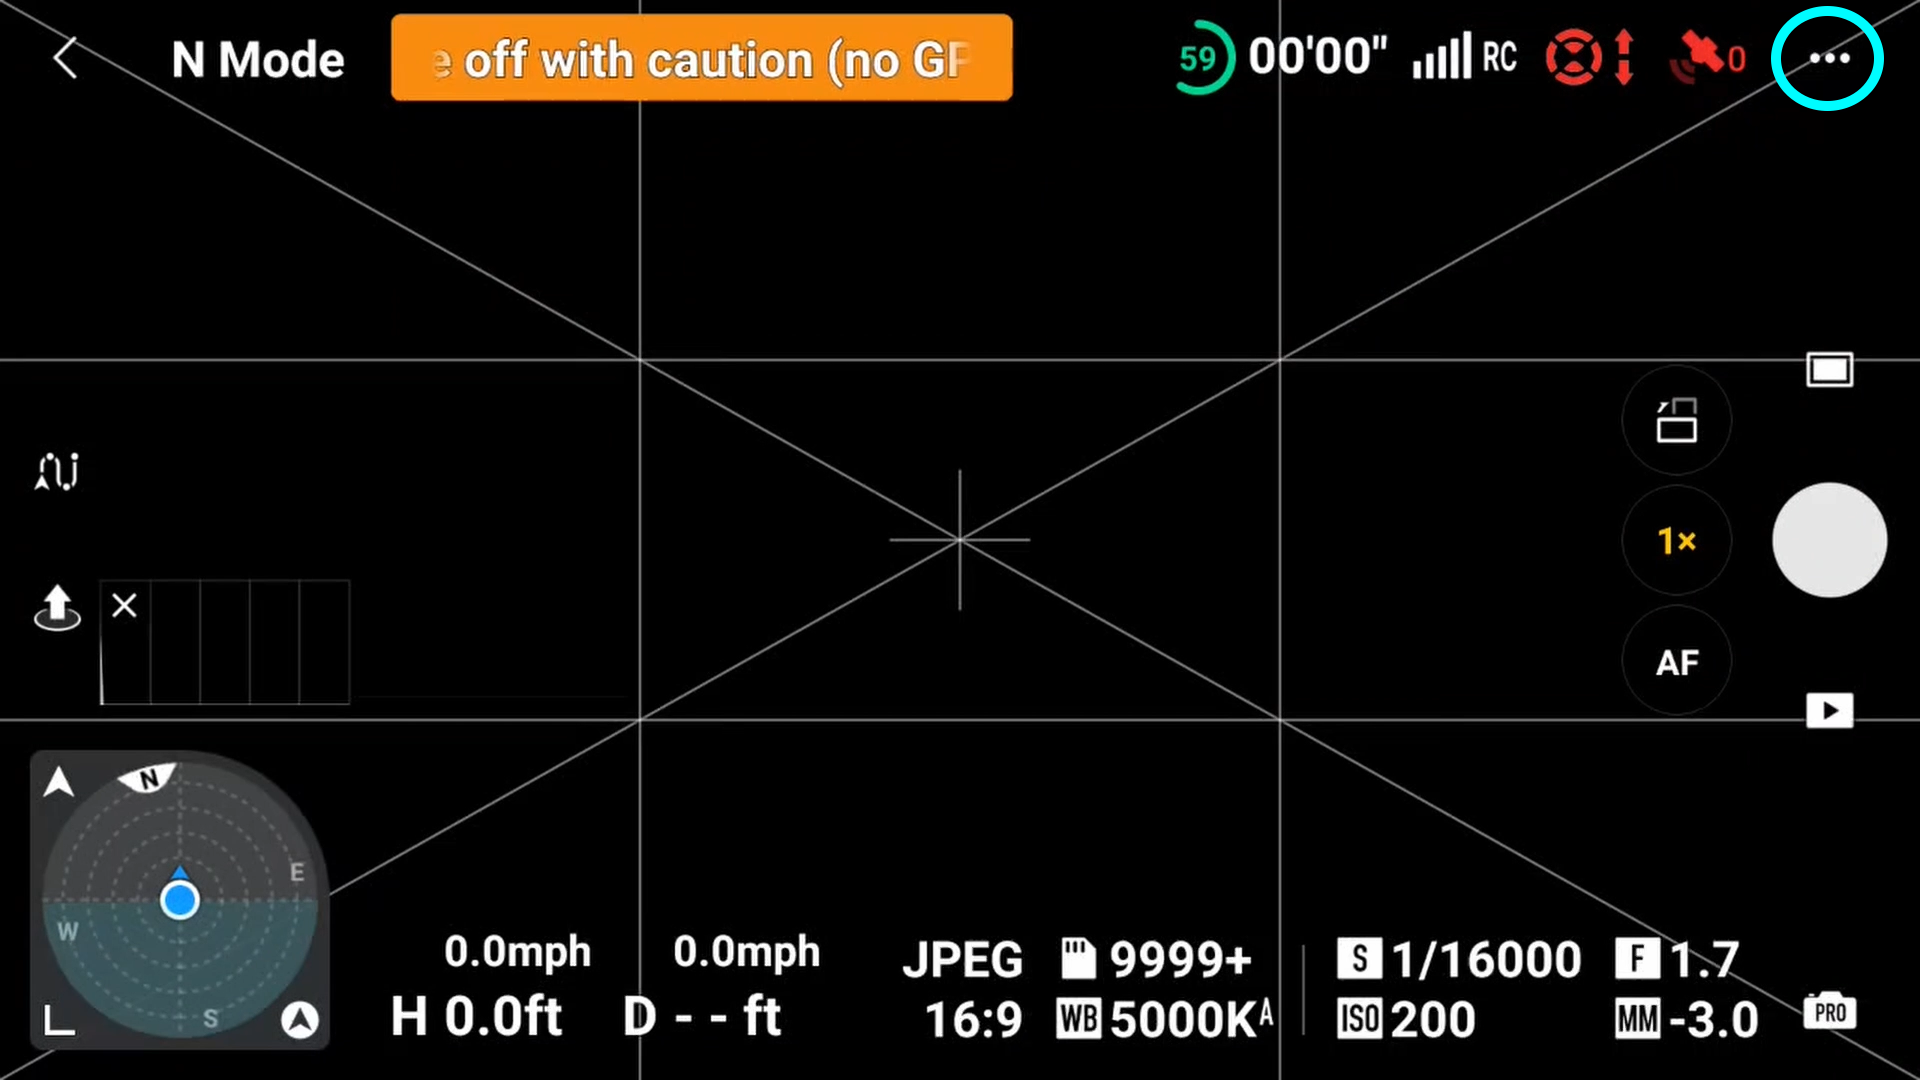
The method for formatting SD playing cards which can be within the Air 3 is completed throughout the DJI Fly app, whether or not you might have a DJI RC 2 or the RC-N2 distant controller.
To format the SD card, after powering on each the Air 3 and your present RC:
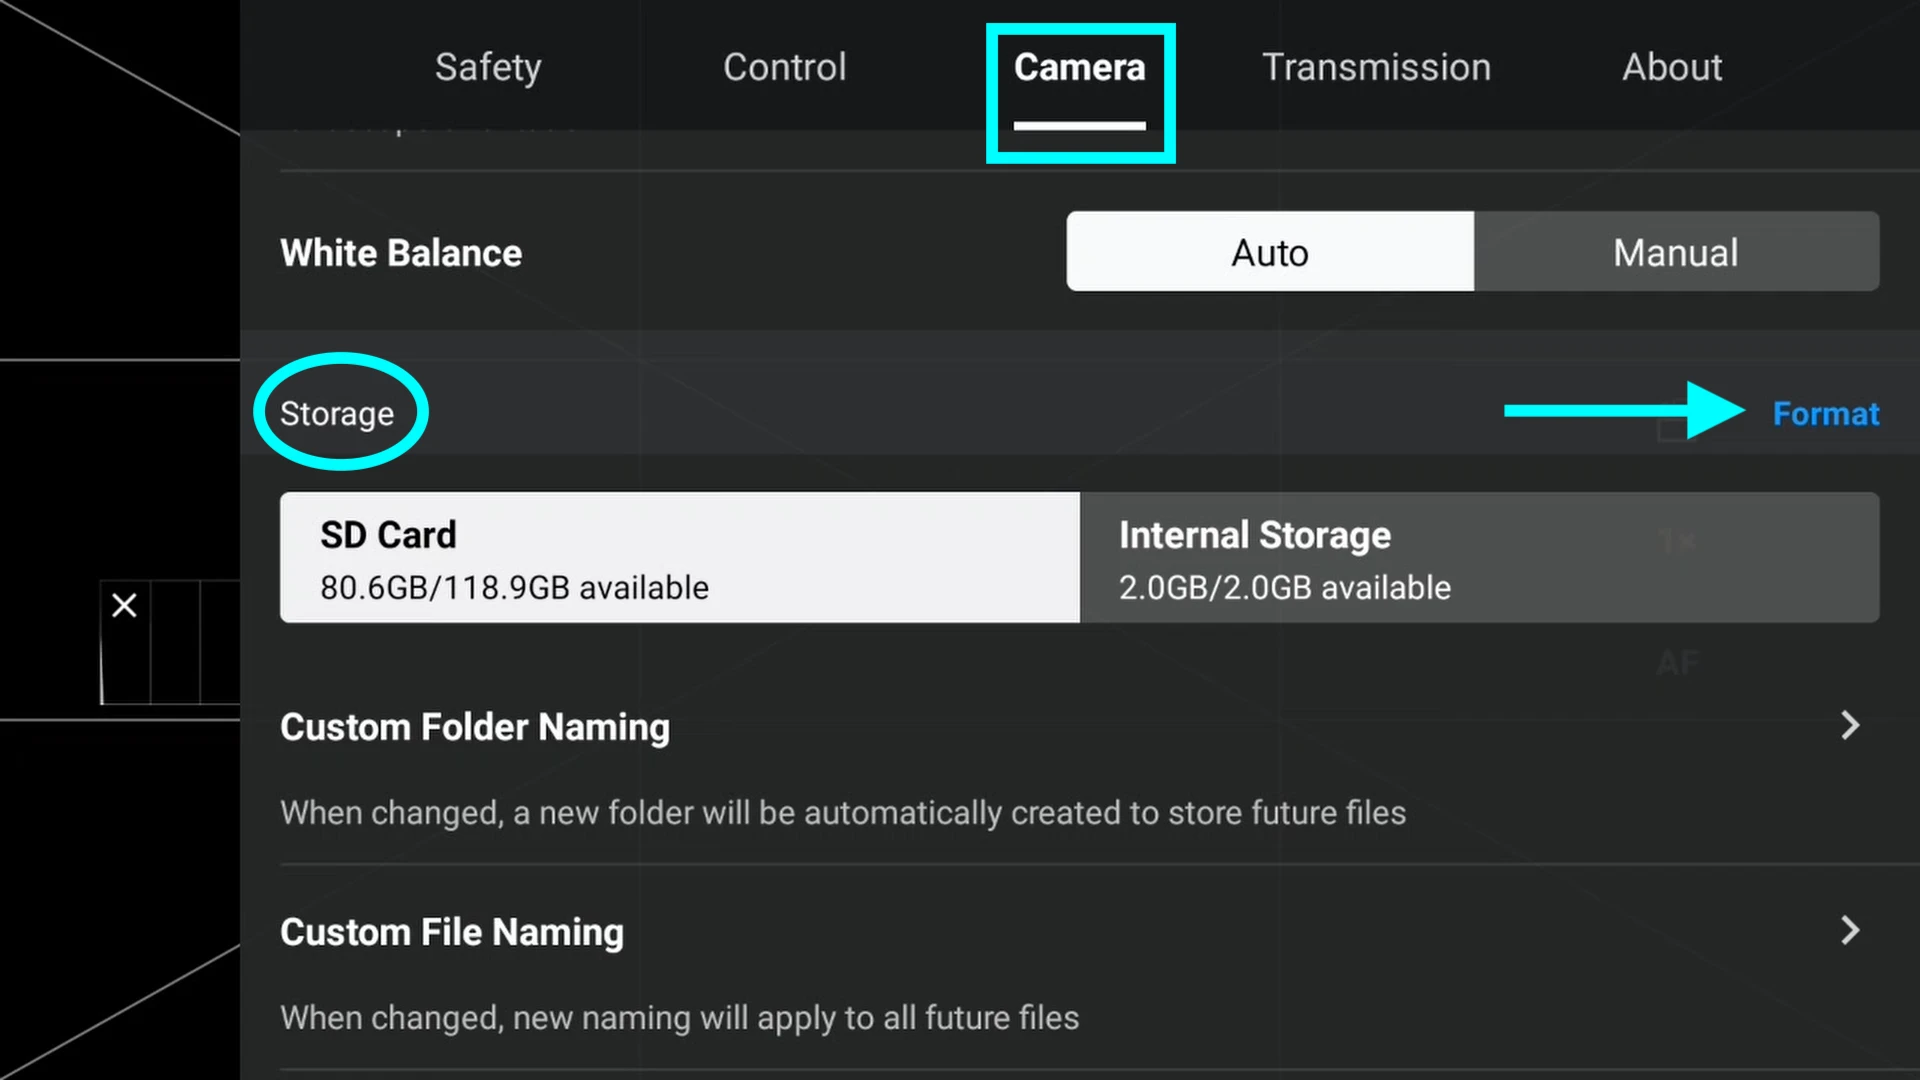
STEP 1: Whereas within the DJI Fly app, go into your settings and find the CAMERA tab.


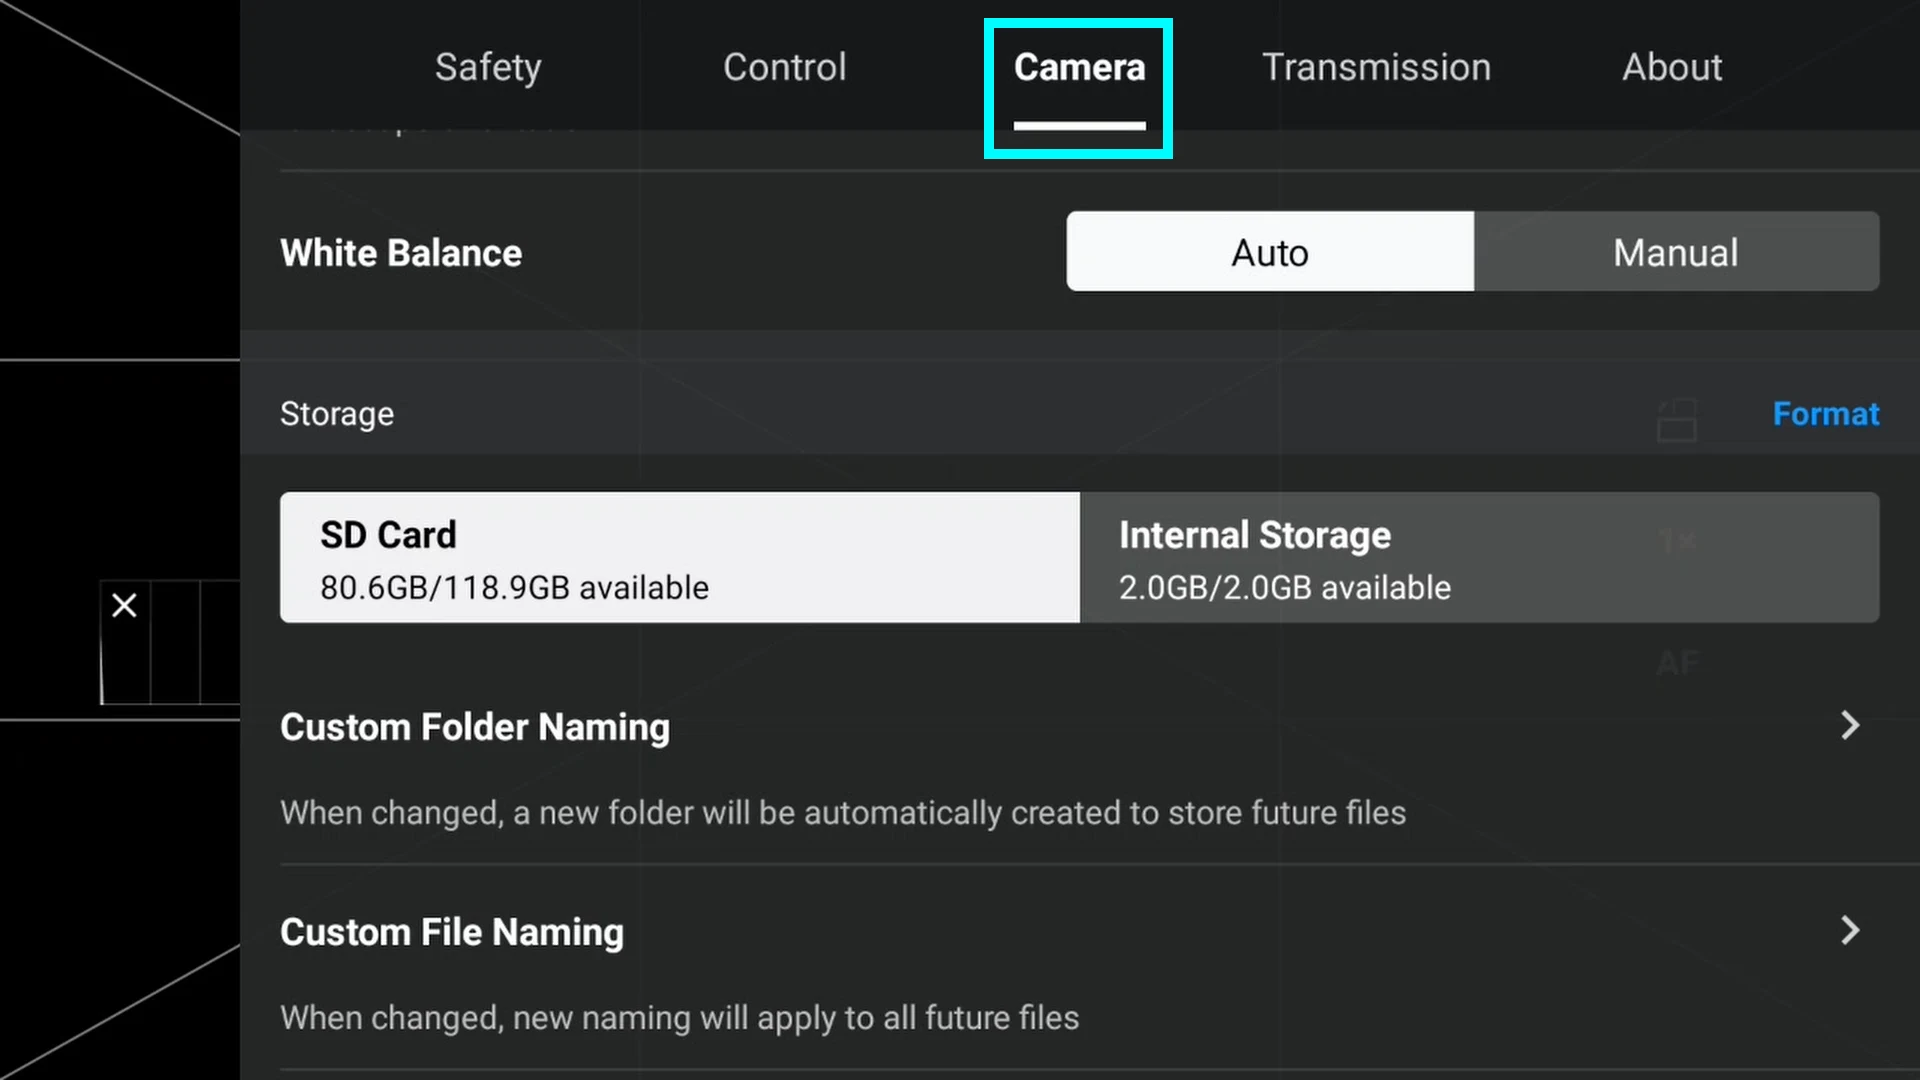
STEP 2: Below storage, press format. You can be introduced with an choice to format both the SD card or Inside Storage. Select SD card and press Format.


Formatting the Micro-SD Card (DJI RC 2)
Not like formatting the SD card within the Air 3, to format the DJI RC 2’s SD card you are able to do so from any display whereas the RC is powered on.
To format the DJI RC 2’s SD card:
STEP 1: Pull down the DJI RC 2’s notification display by double-swiping down.
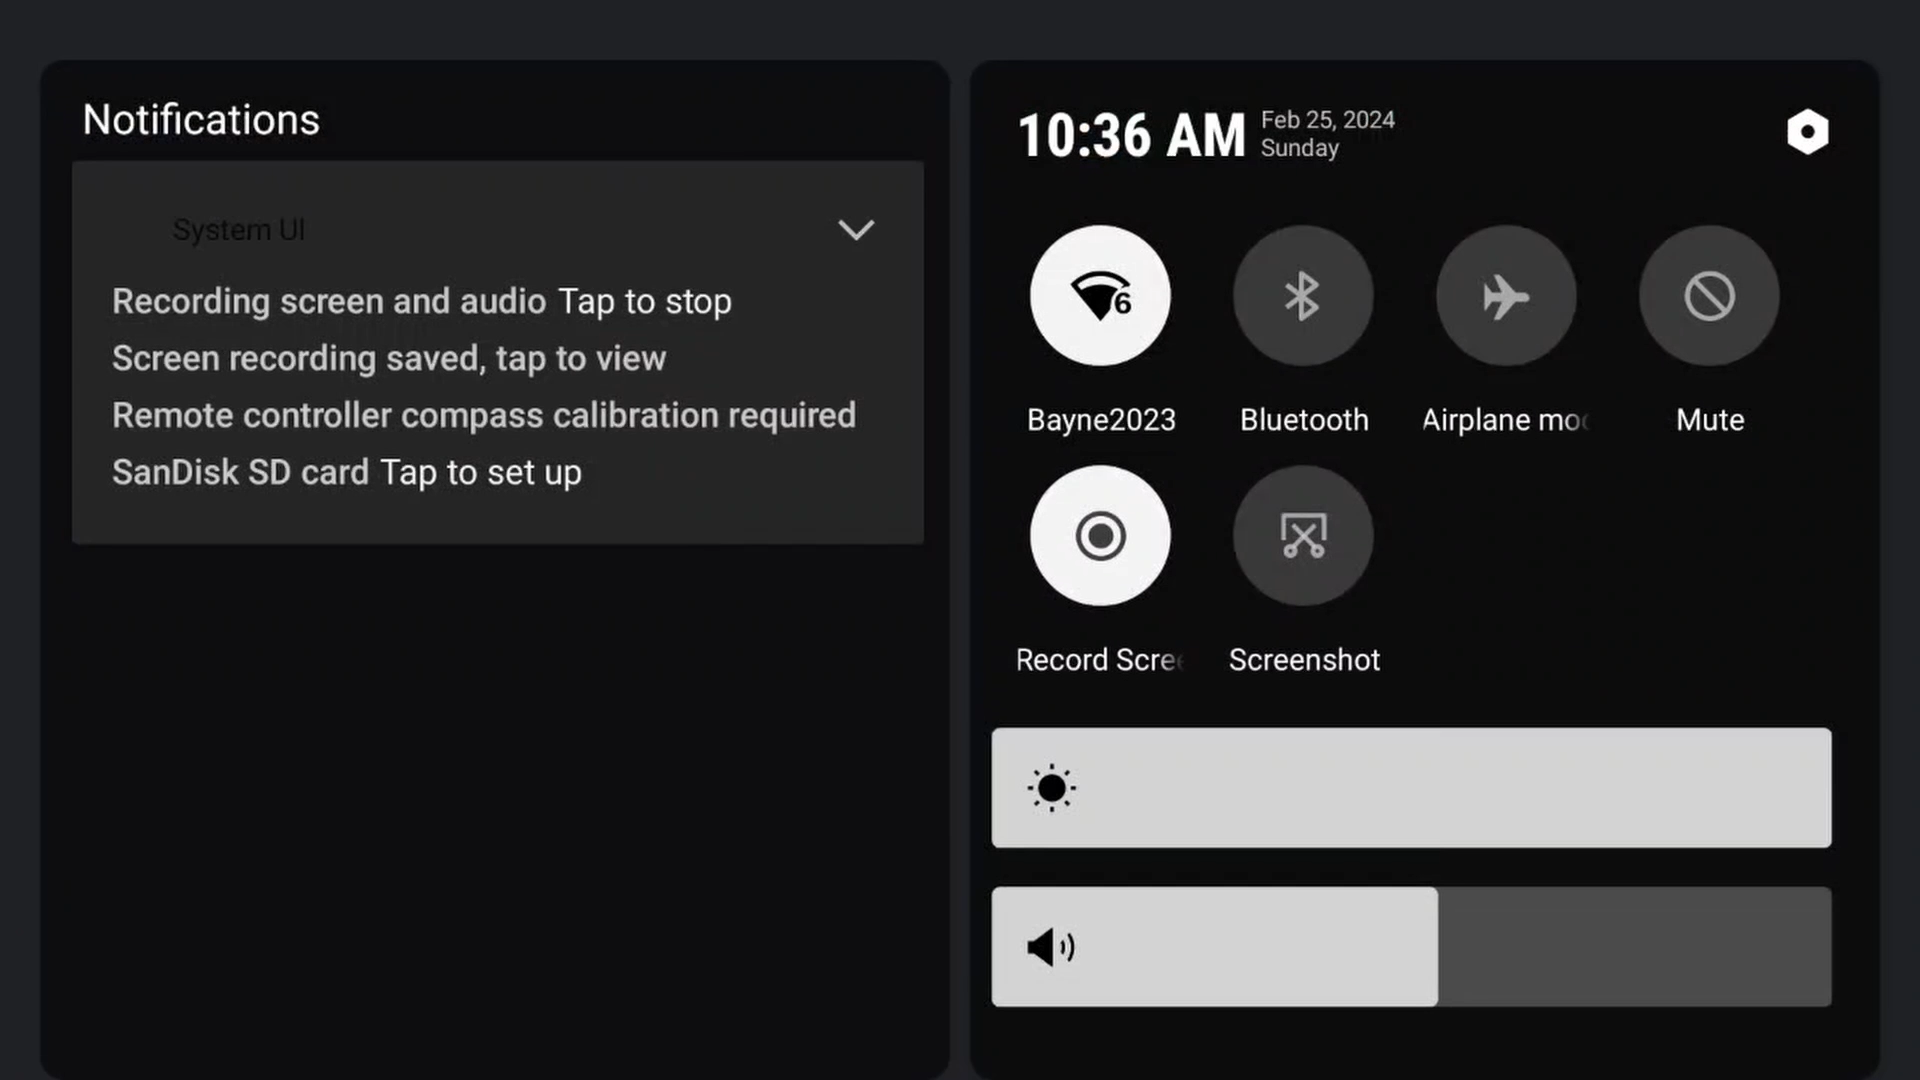
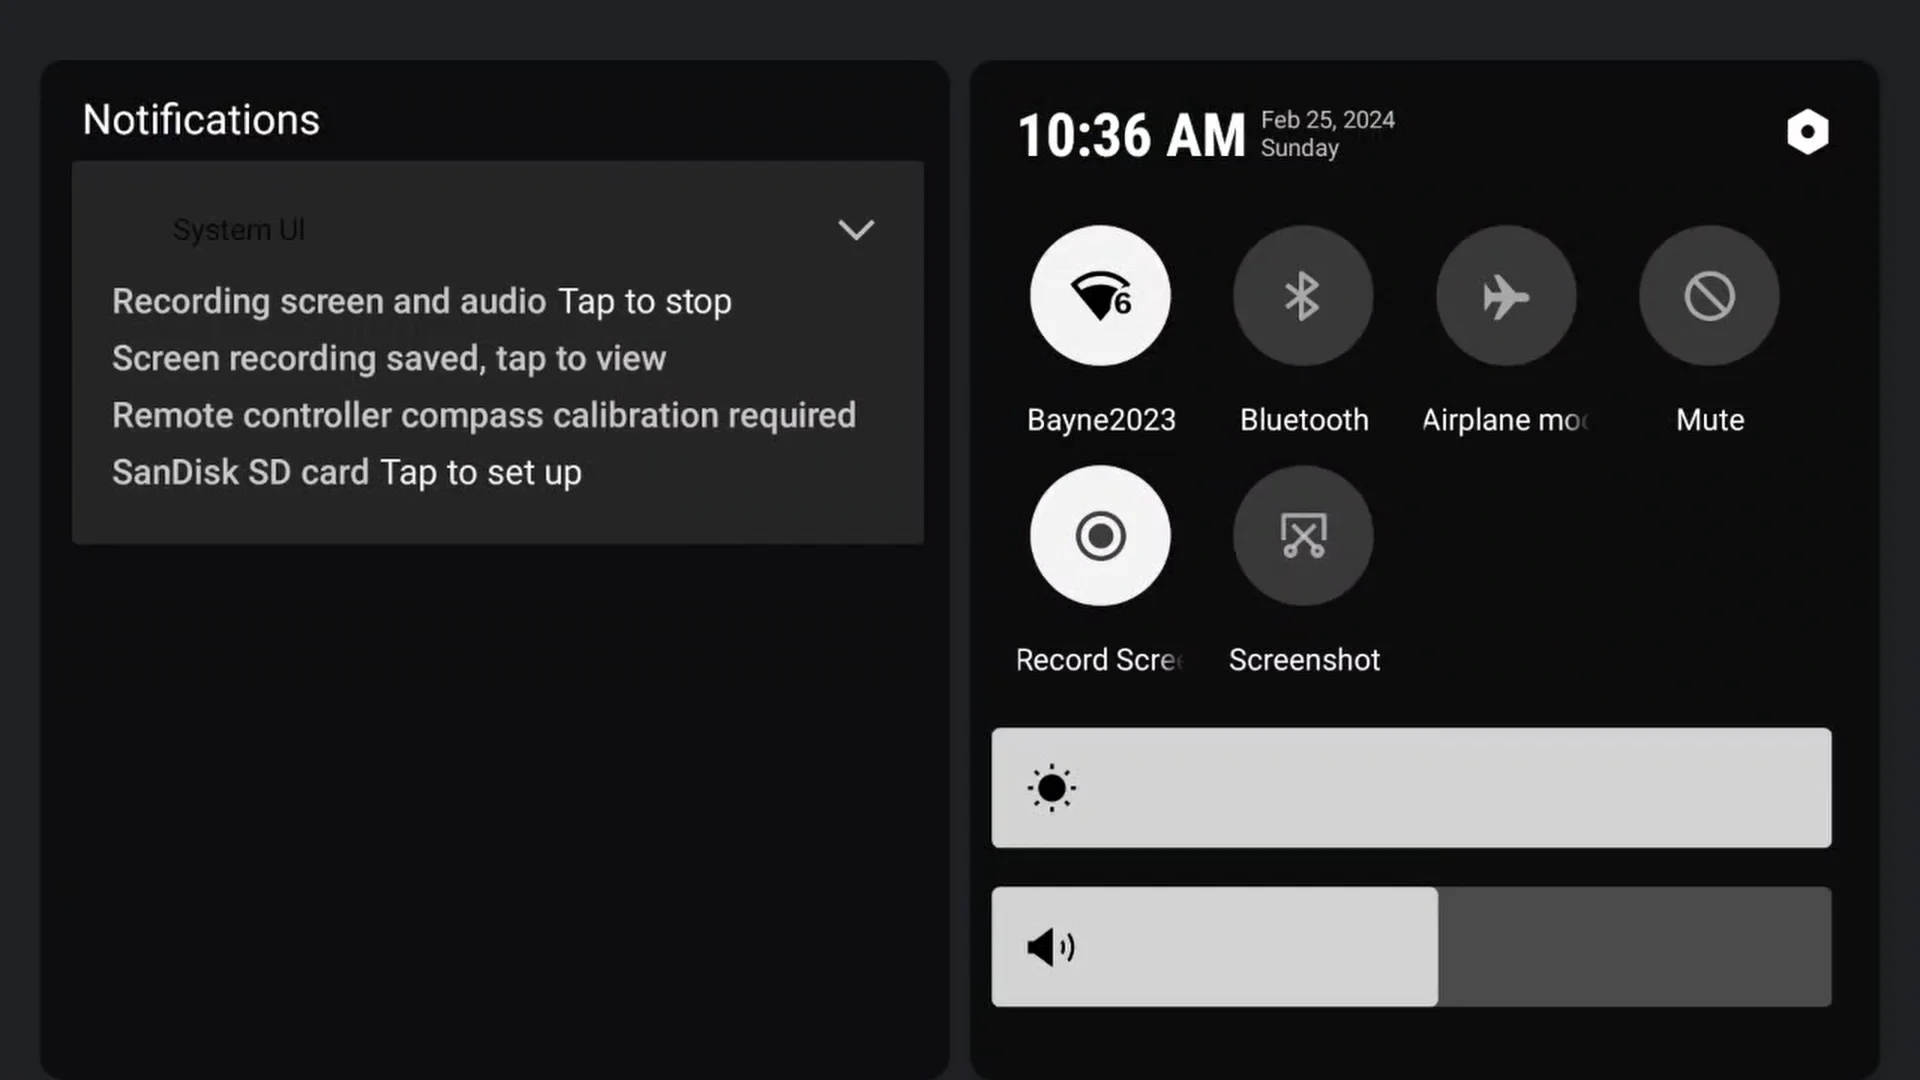
STEP 2: Press the settings/choices gear within the higher right-hand nook of the display.


STEP 3: Faucet STORAGE
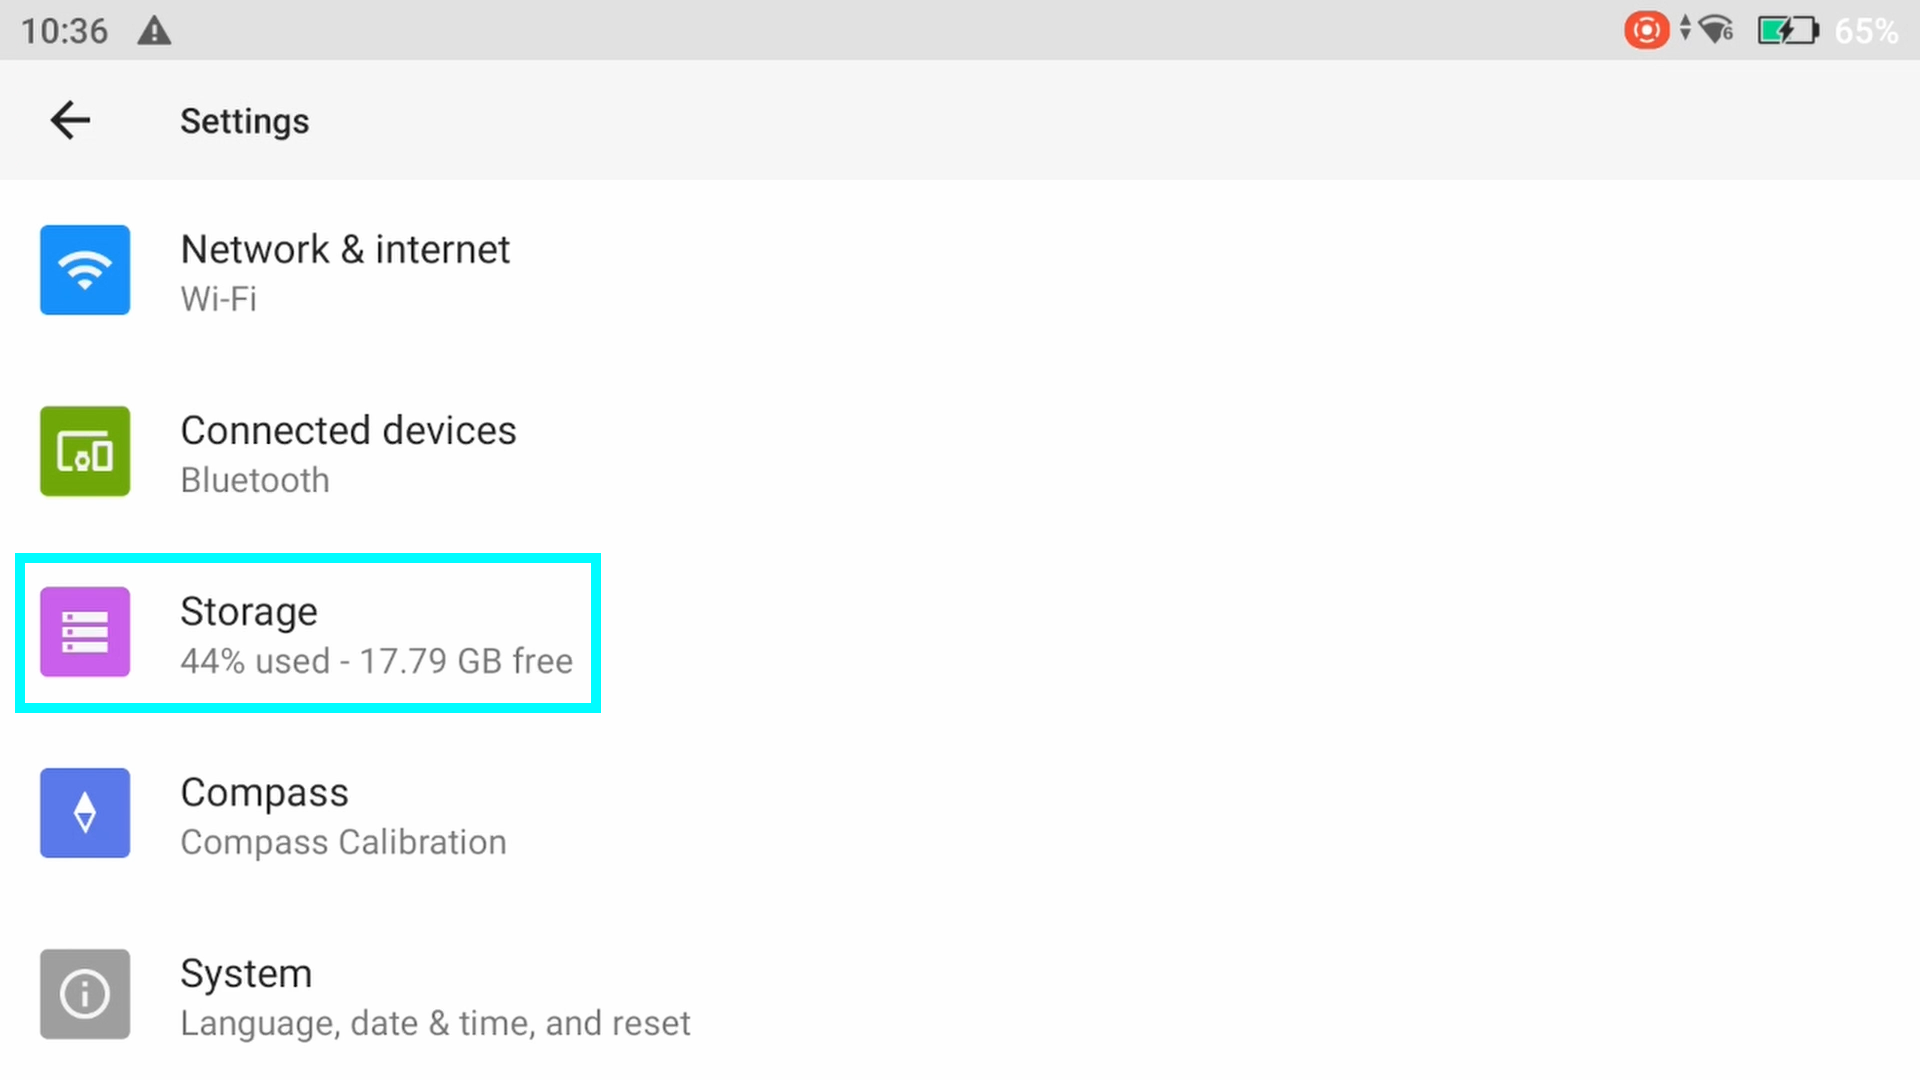

STEP 4: On the underside of the display, underneath Moveable Storage, you will note your SD card. Mine is labeled DJIRC2.

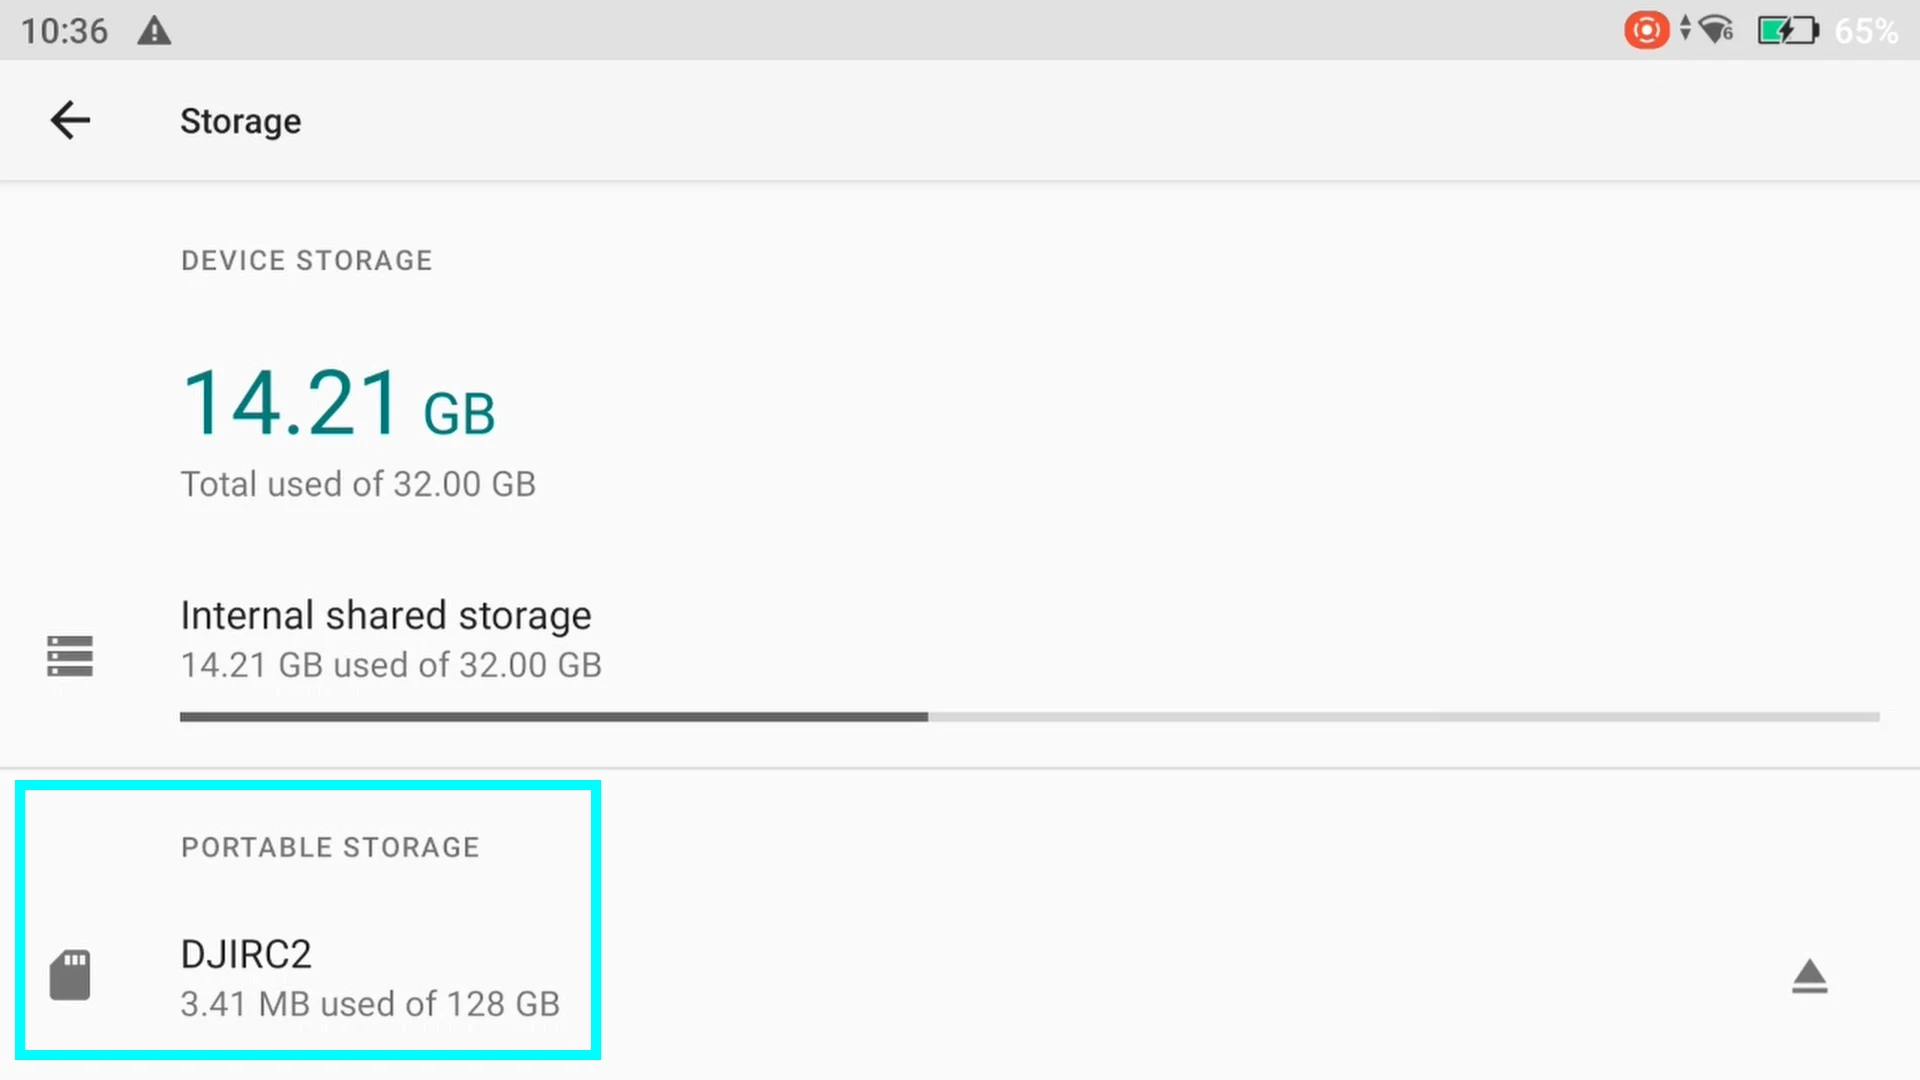
Faucet in your SD card’s title. You’ll see your SD playing cards used house.
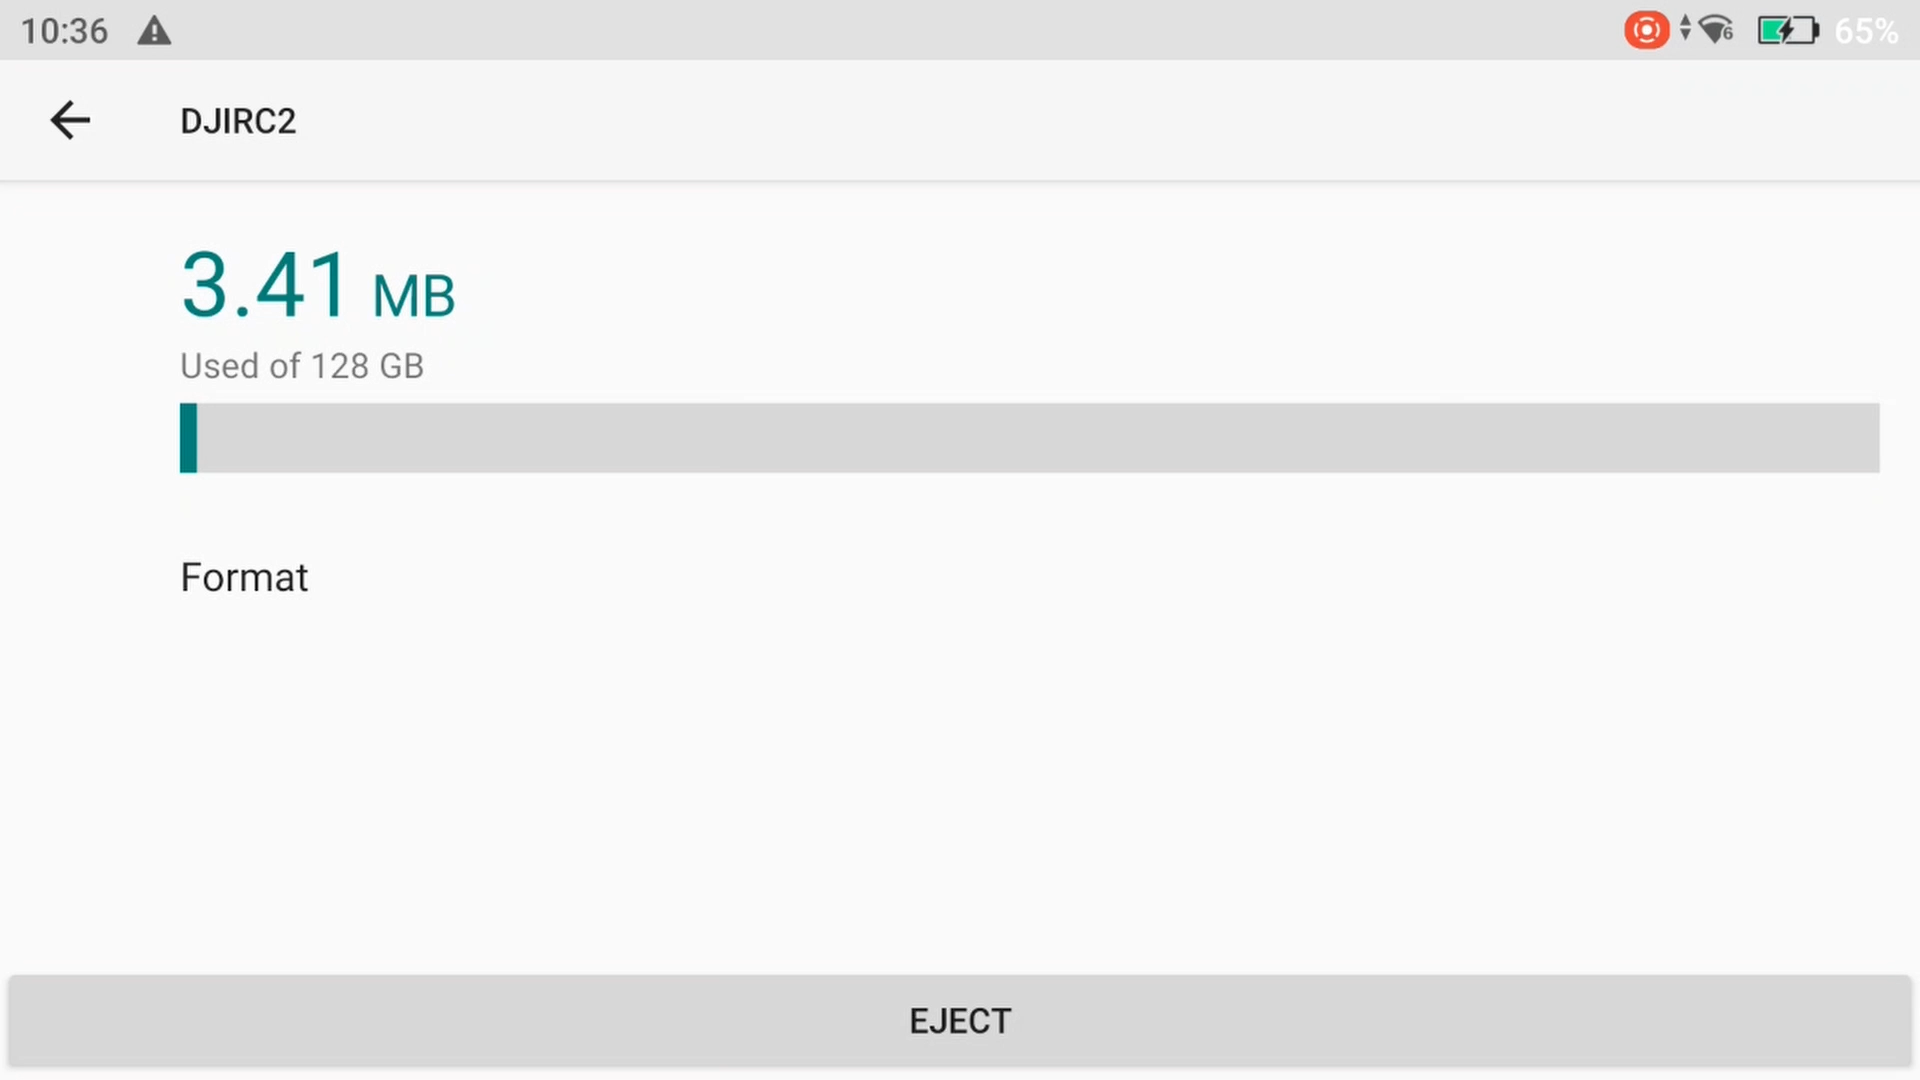
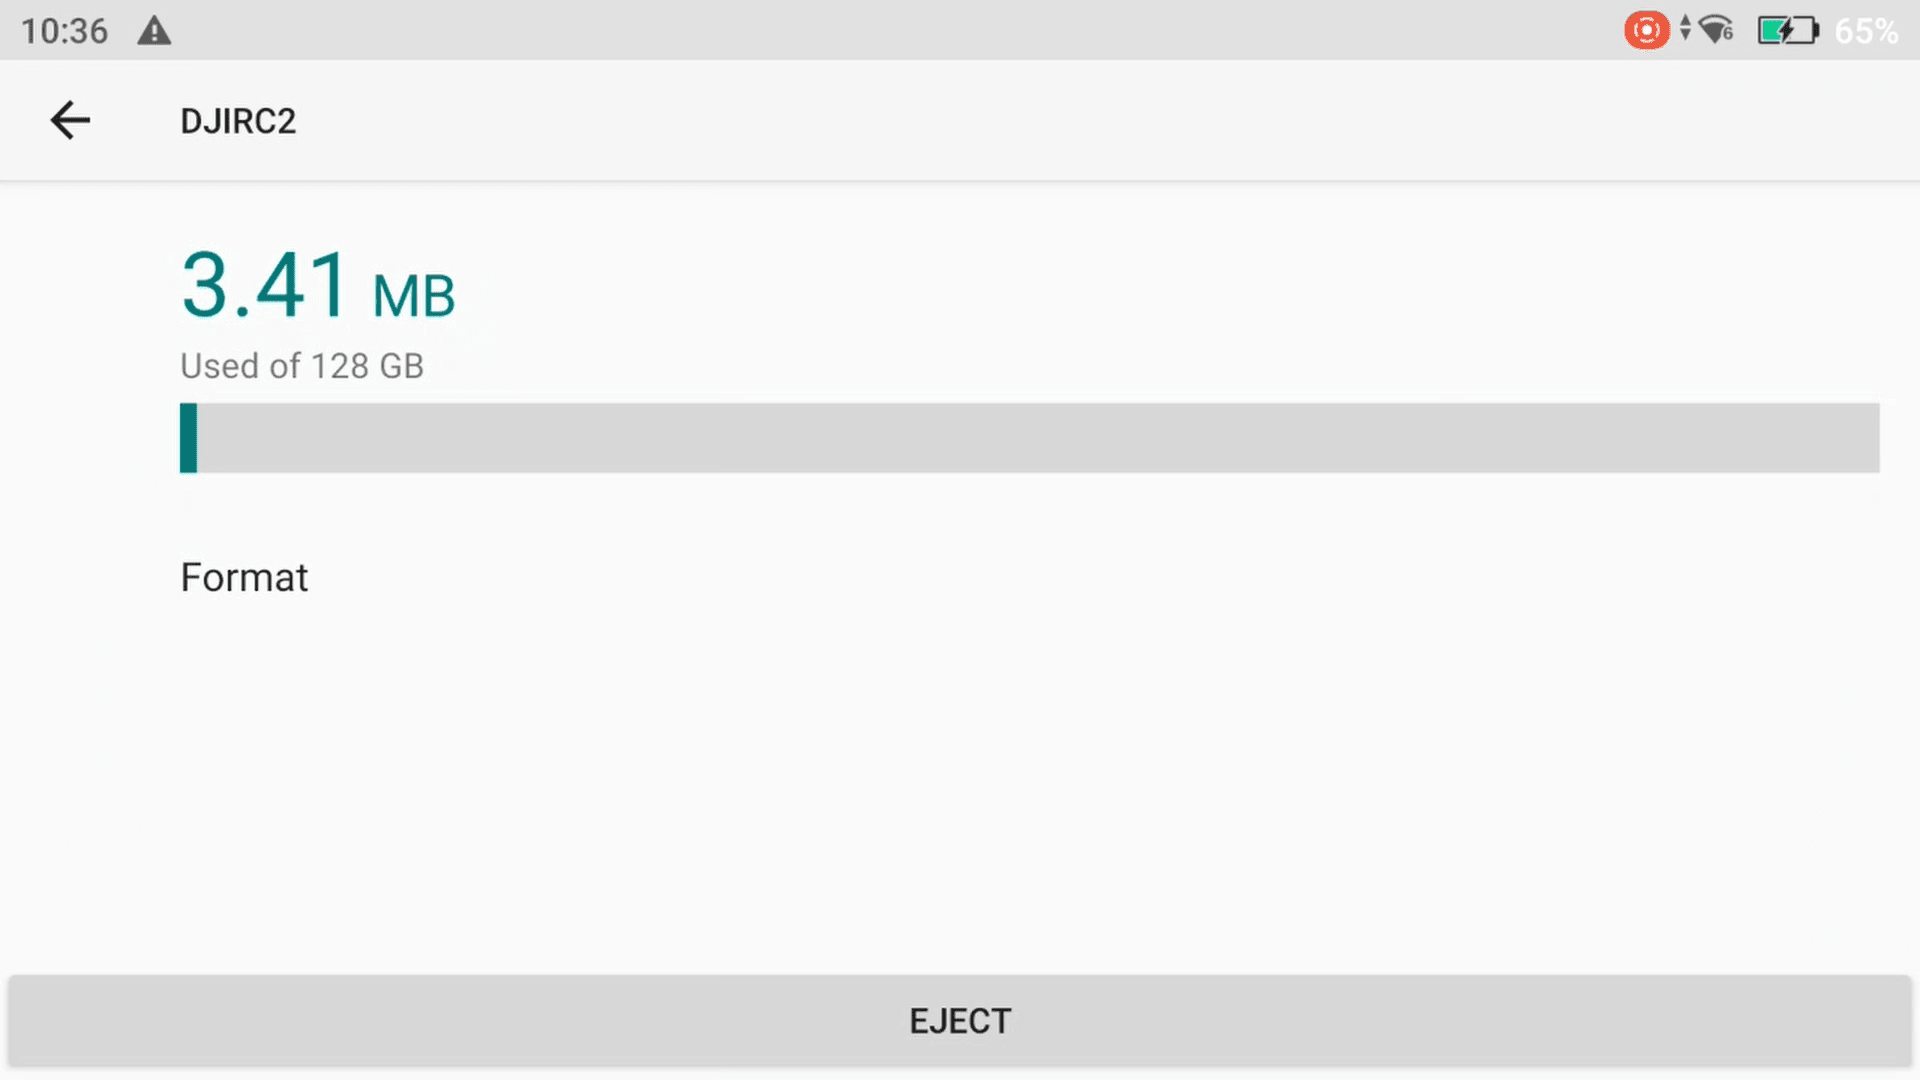
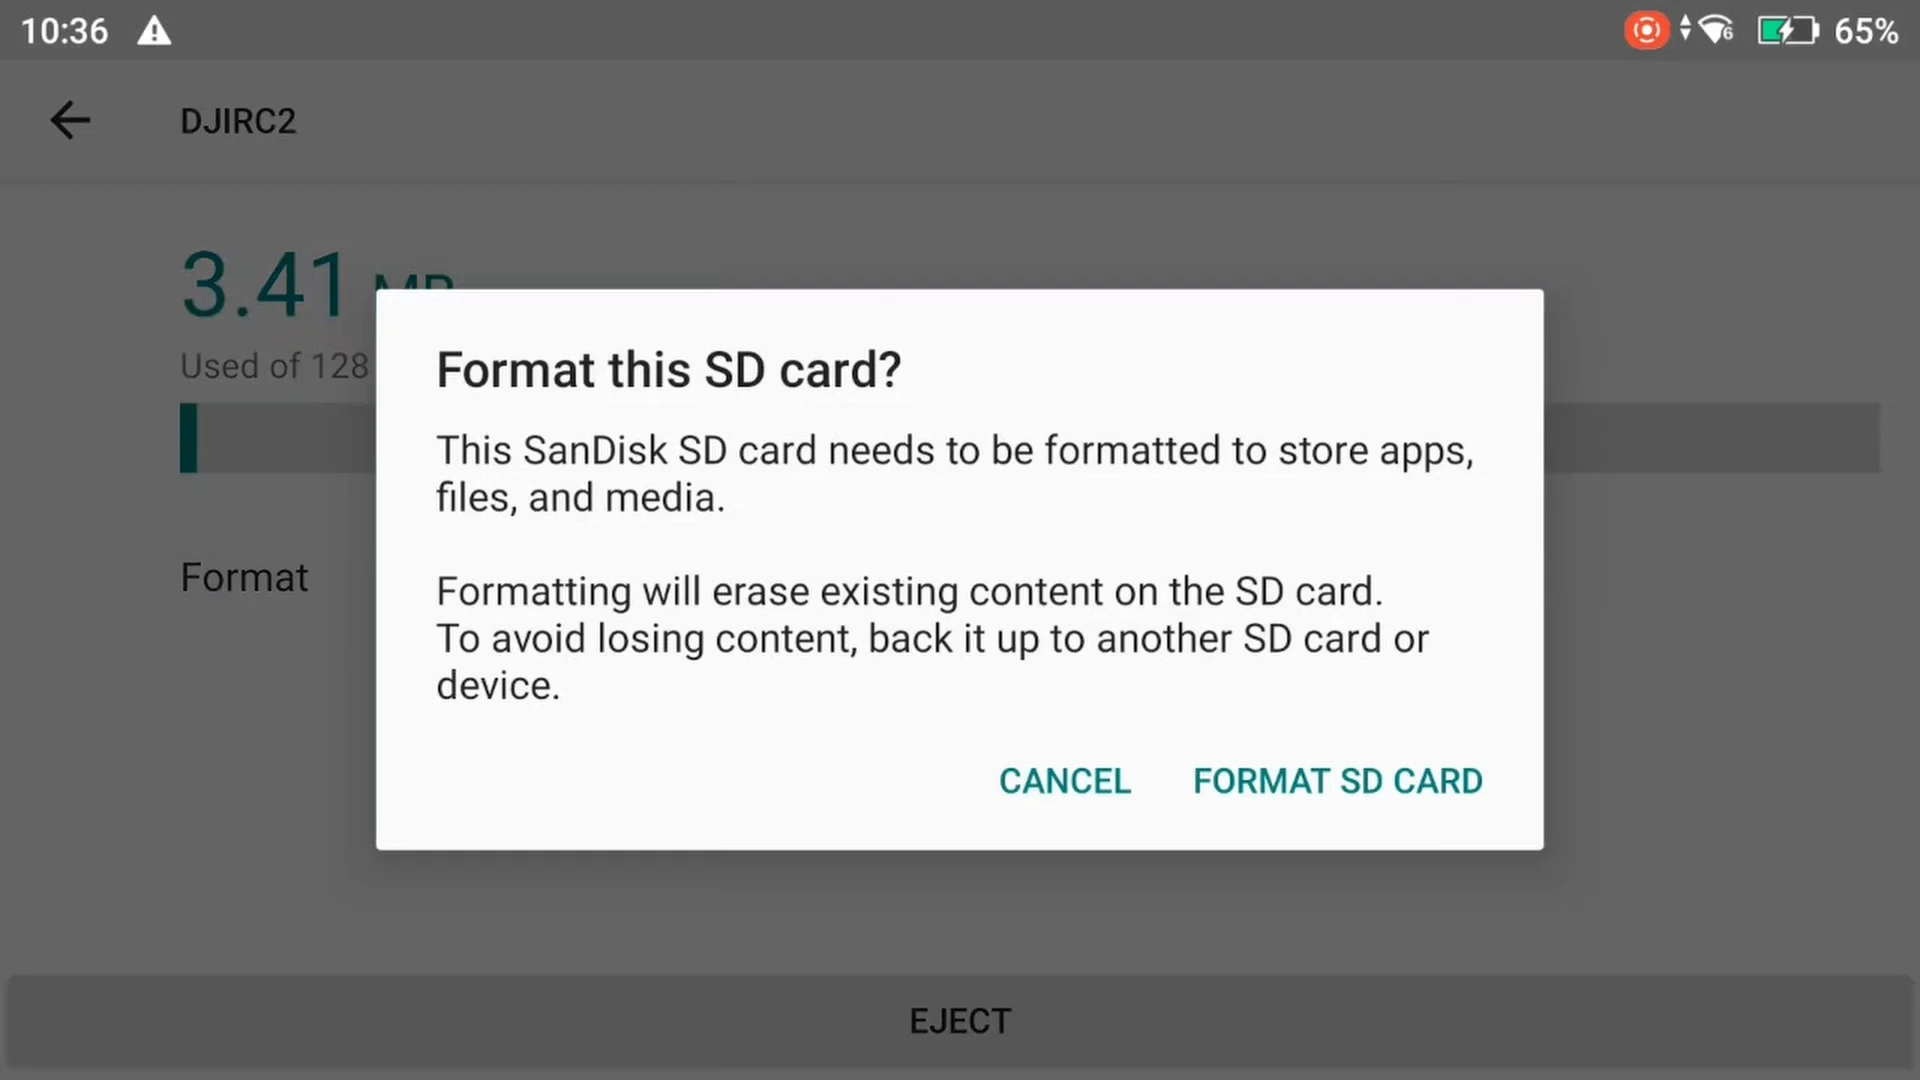
STEP 5: Press Format. You’ll then be requested to format the SD card. Should you select to format right now, press FORMAT SD CARD or in any other case select CANCEL

Ejecting the Micro-SD Card
Ejecting the SD card from both the Air 3 or DJI RC 2 is dealt with the identical.
Warning should be exercised when eradicating both SD card, as a finger slip may cause the SD card to force-eject randomly.
To eject both the Air 3 or DJI RC 2 SD card:
STEP 1: Utilizing a thumbnail, at a slight angle, push the SD card in after which slowly take away your thumb.
STEP 2: Rigorously pull the SD card out.
Tip: In case you have bigger fingers, or discover it tough to take away the SD card, merely connect a bit of scotch tape to the top of the SD card, successfully making a tab to tug the SD card out.
CP PLUS 3 MP Full HD Smart Wi-fi CCTV Camera | 360° Pan & Tilt | View & Talk | Motion Alert | Night Vision | SD Card (Up to 128 GB) | Alexa & OK Google | 2-Way Talk | IR Distance 10Mtr | CP-E35A
₹1,299.00 (as of April 1, 2024 14:09 GMT +00:00 - More infoProduct prices and availability are accurate as of the date/time indicated and are subject to change. Any price and availability information displayed on [relevant Amazon Site(s), as applicable] at the time of purchase will apply to the purchase of this product.)
Oneplus Bullets Z2 Bluetooth Wireless in Ear Earphones with Mic, Bombastic Bass - 12.4 mm Drivers, 10 Mins Charge - 20 Hrs Music, 30 Hrs Battery Life, IP55 Dust and Water Resistant (Magico Black)
₹1,499.00 (as of April 1, 2024 14:09 GMT +00:00 - More infoProduct prices and availability are accurate as of the date/time indicated and are subject to change. Any price and availability information displayed on [relevant Amazon Site(s), as applicable] at the time of purchase will apply to the purchase of this product.)
Samsung Galaxy M14 5G (ICY Silver,6GB,128GB)|50MP Triple Cam|Segment's Only 6000 mAh 5G SP|5nm Processor|2 Gen. OS Upgrade & 4 Year Security Update|12GB RAM with RAM Plus|Android 13|Without Charger
₹13,990.00 (as of April 1, 2024 14:09 GMT +00:00 - More infoProduct prices and availability are accurate as of the date/time indicated and are subject to change. Any price and availability information displayed on [relevant Amazon Site(s), as applicable] at the time of purchase will apply to the purchase of this product.)
realme narzo N53 (Feather Gold, 8GB+128GB) 33W Segment Fastest Charging | Slimmest Phone in Segment | 90 Hz Smooth Display
₹8,999.00 (as of April 1, 2024 14:09 GMT +00:00 - More infoProduct prices and availability are accurate as of the date/time indicated and are subject to change. Any price and availability information displayed on [relevant Amazon Site(s), as applicable] at the time of purchase will apply to the purchase of this product.)
JBL C100SI Wired In Ear Headphones with Mic, JBL Pure Bass Sound, One Button Multi-function Remote, Angled Buds for Comfort fit (Black)
₹599.00 (as of April 1, 2024 14:09 GMT +00:00 - More infoProduct prices and availability are accurate as of the date/time indicated and are subject to change. Any price and availability information displayed on [relevant Amazon Site(s), as applicable] at the time of purchase will apply to the purchase of this product.)
Logitech B170 Wireless Mouse, 2.4 GHz with USB Nano Receiver, Optical Tracking, 12-Months Battery Life, Ambidextrous, PC/Mac/Laptop - Black
₹595.00 (as of April 1, 2024 14:09 GMT +00:00 - More infoProduct prices and availability are accurate as of the date/time indicated and are subject to change. Any price and availability information displayed on [relevant Amazon Site(s), as applicable] at the time of purchase will apply to the purchase of this product.)
Portronics My Buddy K Portable Laptop Stand with Adjustable Height, Foldable, OverHeating Protection for Laptops & MacBooks (Grey)
₹498.00 (as of April 1, 2024 14:09 GMT +00:00 - More infoProduct prices and availability are accurate as of the date/time indicated and are subject to change. Any price and availability information displayed on [relevant Amazon Site(s), as applicable] at the time of purchase will apply to the purchase of this product.)
STRIFF Adjustable Laptop Tabletop Stand Patented Riser Ventilated Portable Foldable Compatible with MacBook Notebook Tablet Tray Desk Table Book with Free Phone Stand (Black)
₹299.00 (as of April 1, 2024 14:09 GMT +00:00 - More infoProduct prices and availability are accurate as of the date/time indicated and are subject to change. Any price and availability information displayed on [relevant Amazon Site(s), as applicable] at the time of purchase will apply to the purchase of this product.)
Dell MS116 Wired Optical Mouse, 1000DPI, LED Tracking, Scrolling Wheel, Plug and Play
₹309.00 (as of April 1, 2024 14:09 GMT +00:00 - More infoProduct prices and availability are accurate as of the date/time indicated and are subject to change. Any price and availability information displayed on [relevant Amazon Site(s), as applicable] at the time of purchase will apply to the purchase of this product.)
Dyazo 6 Angles Adjustable Aluminum Ergonomic Foldable Portable Tabletop Laptop/Desktop Riser Stand Holder Compatible for MacBook, HP, Dell, Lenovo & All Other Notebook (Silver)
₹399.00 (as of April 1, 2024 14:09 GMT +00:00 - More infoProduct prices and availability are accurate as of the date/time indicated and are subject to change. Any price and availability information displayed on [relevant Amazon Site(s), as applicable] at the time of purchase will apply to the purchase of this product.)Auto Amazon Links: No products found.