

Refit is an open-source library for .NET, .NET Core, and Xamarin that makes consuming REST APIs less complicated and simpler by enabling you to outline the API endpoints as C# interfaces, thereby eliminating the necessity to create HTTP requests and parse HTTP responses manually.
On this article we are going to delve into the Refit library for .NET and see first-hand the way it simplifies the event of APIs. To make use of the code examples offered on this article, you need to have Visible Studio 2022 put in in your system. In the event you don’t have already got a duplicate, you possibly can obtain Visible Studio 2022 right here.
In sections beneath, we are going to implement two purposes, a Contact API and a consumer utility for consuming the Contact API. The Contact API utility will comprise the next varieties:
- Contact: This represents the mannequin class.
- IContactRepository: This represents the interface for the contact repository.
- ContactRepository: This represents the contact repository class that comprises strategies to return contact knowledge.
- ContactsController: This represents the API controller used to reveal Contact API endpoints to API purchasers.
The consumer utility will use Refit to devour the Contact API and show the data retrieved on the console window.
What’s Refit? Why is it helpful?
Refit is a type-safe, quick, REST library for .NET, .NET Core, and Xamarin that turns your REST API into an interface, making it simpler to devour RESTful net companies. Refit routinely transforms HTTP calls into C# interfaces utilizing attributes to explain REST operations, thereby simplifying the method of connecting with APIs utilizing minimal code.
To devour APIs utilizing Refit, you want an interface that may work together along with your API. Refit acts as a wrapper across the strategies of this interface and handles HTTP requests and responses elegantly. Refit will routinely generate the required boilerplate code so that you can entry your APIs.
In the event you’re utilizing Refit for the primary time, you should first configure the HTTP consumer occasion by specifying the bottom tackle, HTTP headers, serialization, and deserialization info, and so on. The next code snippet reveals how we are able to configure the HTTP consumer occasion to connect with an endpoint in ASP.NET Core.
string baseAddress = "http://localhost:59904/"; HttpClient _client = new HttpClient(); _client.BaseAddress = new Uri($"{BaseUrl}"); _client.DefaultRequestHeaders.Settle for.Clear(); _client.DefaultRequestHeaders.Settle for.Add(new MediaTypeWithQualityHeaderValue("utility/json")); string url = BaseUrl + "api/authors"; var response = await _client.GetAuthors(url); if (response.IsSuccessStatusCode) { var consequence = await response.Content material.ReadAsStringAsync(); var knowledge = JsonSerializer.Deserialize<Record>(consequence); }
In the event you’re already utilizing Refit, you needn’t be bothered with the boilerplate code, as a result of Refit can deal with all of those duties with only a few strains of C# code.
string baseAddress = "http://localhost:59904/";
var endpoint = RestService.For(baseAddress);
var contacts = await endpoint.GetAuthors();
As you possibly can see from the previous code snippets, Refit can save us a whole lot of effort and time by eliminating the necessity to write the boilerplate code.
Within the subsequent sections, we’ll implement a easy net API in ASP.NET Core. After we create our API, we’ll implement a Refit consumer to devour it.
Create an ASP.NET Core Net API mission in Visible Studio 2022
To create an ASP.NET Core 8 Net API mission in Visible Studio 2022, comply with the steps outlined beneath.
- Launch the Visible Studio 2022 IDE.
- Click on on “Create new mission.”
- Within the “Create new mission” window, choose “ASP.NET Core Net API” from the checklist of templates displayed.
- Click on Subsequent.
- Within the “Configure your new mission” window, specify the title and placement for the brand new mission. Optionally examine the “Place resolution and mission in the identical listing” examine field, relying in your preferences.
- Click on Subsequent.
- Within the “Further Info” window proven subsequent, choose “.NET 8.0 (Lengthy Time period Help)” because the framework model and be certain that the “Use controllers” field is checked. We will probably be utilizing controllers on this mission.
- Elsewhere within the “Further Info” window, depart the “Authentication Sort” set to “None” (the default) and make sure the examine packing containers “Allow Open API Help,” “Configure for HTTPS,” and “Allow Docker” stay unchecked. We received’t be utilizing any of these options right here.
- Click on Create.
We’ll use this ASP.NET Core Net API mission to create our API within the sections beneath.
Create the Contact mannequin class
Create a brand new class named Contact within the Net API mission you simply created and enter the code given beneath.
namespace Refit_Demo
{
     public class Contact
     {
         public int Id { get; set; }
         public string FirstName { get; set; }
         public string LastName { get; set; }
         public string Deal with { get; set; }
         public string Cellphone { get; set; }
     }
 }
We’ll use the Contact class within the subsequent part to work with knowledge.
Create the ContactRepository class
Subsequent, we’ll create a repository class to work with the Contact knowledge. For the sake of simplicity and brevity, we’ll retailer our knowledge in a listing in reminiscence. You may be at liberty to alter this implementation to retailer the info in a database as per your necessities. The ContactRepository class implements the IContactRepository. This interface comprises the declaration of two strategies, specifically, the GetContact and the GetContacts strategies. Whereas the previous returns one contact file primarily based on the id handed to it as a parameter, the latter returns all contacts.
The next code itemizing illustrates each the IContactRepository interface and the ContactRepository class.
public interface IContactRepository
 {     public Contact GetContact(int id);
     public Record GetContacts();
 }
 public class ContactRepository: IContactRepository
 {
     personal readonly Record contacts = new Record();
     public ContactRepository()
     {
         contacts = new Record()
         {
             new Contact()
            { Id =1, FirstName = "Keaton", LastName = "Underwood",
                 Deal with = "12/3 ABC Street, Chicago, USA",
             Cellphone = "1234567890"},
             new Contact(){ Id = 2, FirstName = "John", LastName = "Smith",
                 Deal with = "12/3 ABC Street, New York, USA",
             Cellphone = "0987654321"}
         };
     }
     public Contact GetContact(int id)
     {
         return contacts.SingleOrDefault(c => c.Id == id);
     }
     public Record GetContacts()
     {
         return contacts;
     }
 }
You may register an occasion of kind IContactRepository with the companies assortment within the Program.cs utilizing the next piece of code.
builder.Providers.AddScoped();
This can allow you to make use of dependency injection to create an occasion of kind IContactRepository within the utility.
Create the API controller
Allow us to now create the controller class for our Contacts API. To do that, create a brand new API controller named ContactsController and exchange the generated code with the next code.
utilizing Microsoft.AspNetCore.Mvc;
namespace Refit_Demo.Controllers
{
     [Route("api/[controller]")]
     [ApiController]
     public class ContactsController : ControllerBase
     {
         personal readonly IContactRepository _contactRepository;
         public ContactsController(IContactRepository contactRepository)
         {
             _contactRepository = contactRepository;
         }
         [HttpGet]
         public async Process<Record> Get()
         {
             return await _contactRepository.GetContacts();
         }
         [HttpGet("{id}")]
         public async Process Get(int id)
         {
             return await _contactRepository.GetContact(id);
         }
     }
 }
Be aware how we now have used constructor injection to create an occasion of kind IContactRepository within the previous code itemizing.
Within the subsequent sections, we’ll create a console utility mission and construct the Refit consumer that can devour our contacts API.
Create a .NET Core console utility mission in Visible Studio
Comply with the steps outlined beneath to create a brand new .NET Core console utility mission in Visible Studio.
- Launch the Visible Studio IDE.
- Click on on “Create new mission.”
- Within the “Create new mission” window, choose “Console App (.NET Core)” from the checklist of templates displayed.
- Click on Subsequent.
- Within the “Configure your new mission” window, specify the title and placement for the brand new mission.
- Click on Subsequent.
- Within the “Further info” window proven subsequent, select “.NET 8.0 (Lengthy Time period Help)” because the framework model you need to use.
- Click on Create.
We’ll use this .NET Core console utility mission to create our Refit API consumer.
Set up the Refit NuGet package deal
To put in Refit into your mission, choose the mission within the Resolution Explorer window, then right-click and choose “Handle NuGet Packages.”
Within the NuGet Package deal Supervisor window, seek for the Refit package deal and set up it. Alternatively, you possibly can set up the package deal(s) through the NuGet Package deal Supervisor console by getting into the instructions proven beneath.
PM> Set up-Package deal Refit
Create the Refit API consumer
Now exchange the generated code within the Program.cs file with the next code itemizing.
utilizing Refit;
string baseAddress = "http://localhost:59904/";
var contactsAPI = RestService.For(baseAddress);
var contacts = await contactsAPI.GetContacts(); foreach (var contact in contacts)
{
     Console.WriteLine($"{contact.Id} | {contact.FirstName} |
     {contact.LastName}");
}
Console.ReadLine();
[Headers("Accept: application/json", "Content-type: application/json")]
public interface IContactService
{
     [Get("/api/contacts")]
     public Process GetContact(int id);
     [Get("/api/contacts")]
     public Process<Record> GetContacts();
}
public class Contact
{
     public int Id { get; set; }
     public string FirstName { get; set; }
     public string LastName { get; set; }
     public string Deal with { get; set; }
     public string Cellphone { get; set; }
}
Execute the applying
Since there are two purposes on this instance, you need to run each one after the other. First, run the API utility adopted by the API consumer console utility. When each purposes have been launched, you’ll observe the info retrieved from the Contacts API utility displayed on the console as proven in Determine 1.
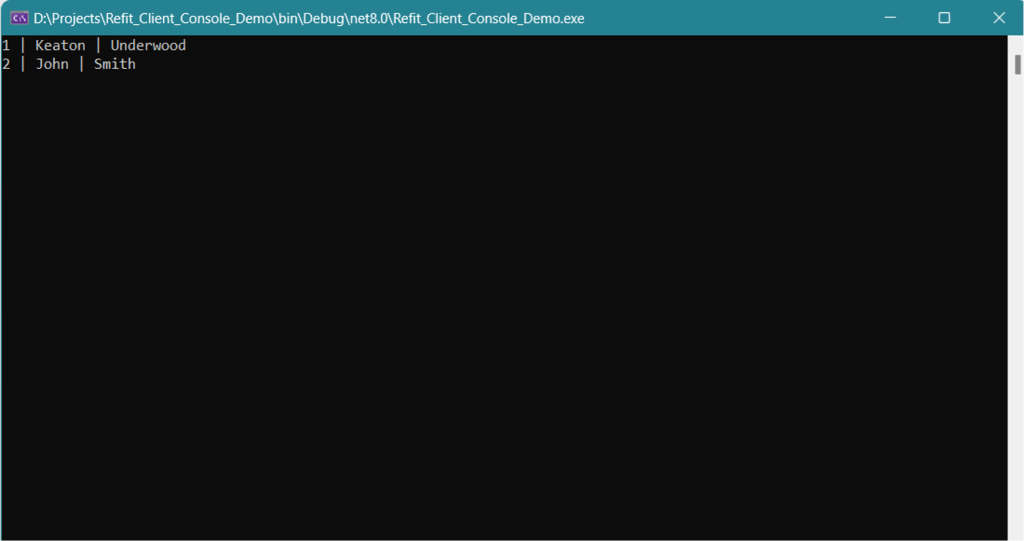
Determine 1. Your Refit API consumer in motion.
IDG
Refit is a good alternative for implementing HTTP REST API purchasers. Refit significantly simplifies the boilerplate code required to connect with and work with REST APIs in your ASP.NET Core purposes. One necessary level to notice is that while you’re utilizing Refit, all requests should be asynchronous. Refit doesn’t help synchronous community calls.