xTool P2 55W Desktop CO2 Laser Cutter assessment
Harness the ability of sunshine with the xTool P2 laser cutter and engraver, a 55W CO2 laser that may make it easier to obtain all of your DIY desires.
Laser chopping is taking the maker world by storm, the identical approach that 3D printing had years in the past. What was as soon as a distinct segment pastime by those that have been snug setting up their very own lasers piecemeal has now opened up due to ready-to-use laser machines that anybody should purchase.
Whereas Glowforge might be some of the well-known ready-to-use lasers on the market, it’s miles from the one one.
That is why we’re excited to check out xTool’s P2 55W Desktop CO2 Laser Cutter. It is an all-in-one machine that has the prospect to revolutionize at-home laser work.
Earlier than I get right down to speaking about my private expertise with the P2 Laser, this is a handful of helpful specs that you need to in all probability know earlier than we get began.
| Laser kind | CO2 laser tube |
| Energy | 55W |
| Weight | 99.2lbs (45kg) |
| Mattress space | 680 mm x 360 mm (26.8″ x 14.2″) |
| Working space | 600 mm x 308 mm (23.6″ x 12.1″) |
| Working peak | 72mm (2.7″), as much as 215mm (8.4″) with add-on riser base |
| Connection varieties | USB C, Ethernet, Wi-Fi |
| Cameras | two 16MP cameras, one huge angle, one precision |
| Engraving precision | 0.01mm |
| Engraving pace | 600mm/s |
| Conveyor assist | sure, with accent |
| Move by means of assist | sure |
| Rotary assist | sure, with accent |
| Emergency cease button | sure |
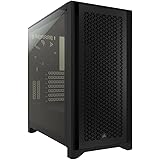
I is usually a little skittish in the case of establishing unfamiliar instruments. That is doubly true for something massive or inherently harmful. The P2 weighs nearly 100 lbs and is roofed in a bunch of stickers warning you to not catch your work space on hearth or shoot a laser into your eyeball — so I used to be a bit hesitant to get began.
I used to be instantly overwhelmed once I lastly obtained time to unbox the P2. Nonetheless, in hindsight, I did not must be. Because it seems, xTool has made a product nearly anybody can arrange.
When you get your P2 out of the field — in all probability essentially the most troublesome process of your entire setup course of — it solely takes about 20 minutes to get your laser operational. That is distinctive, whether or not you are very keen or nervous, because it means you will transfer by means of the annoying setup steps nearly instantly.
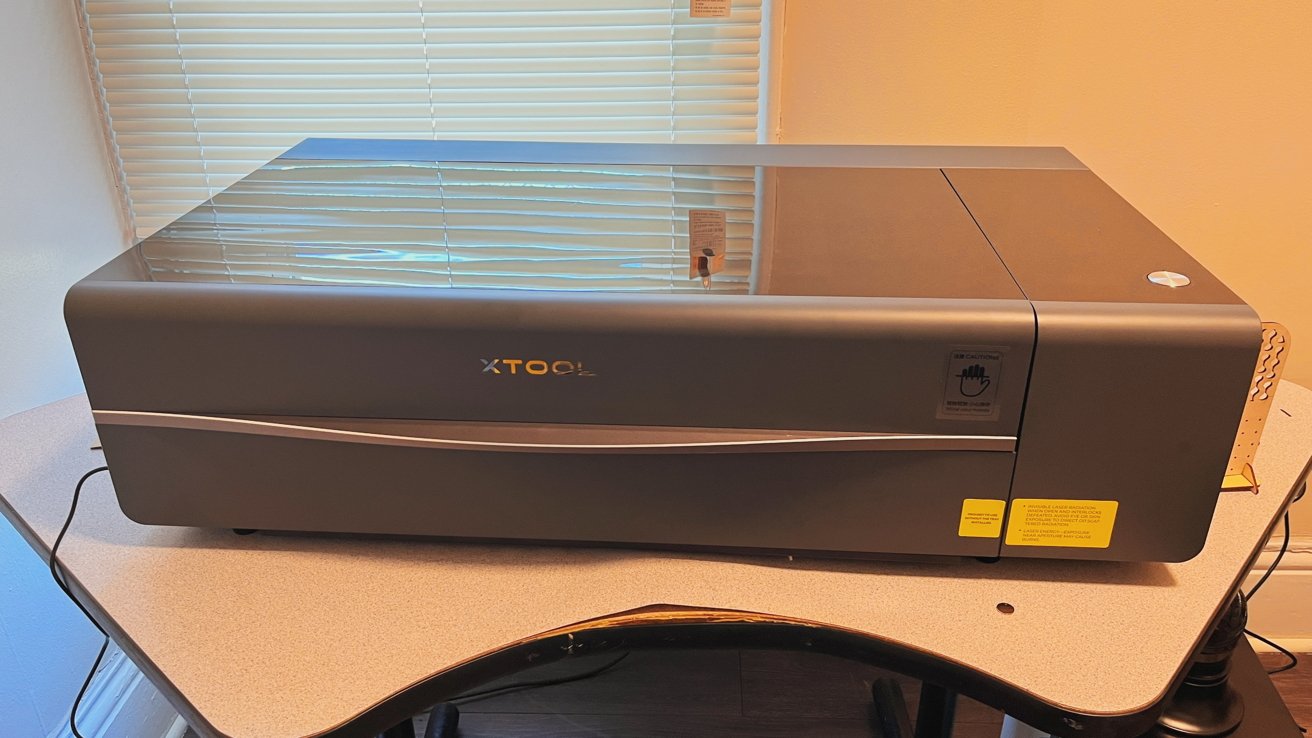
xTool P2 55W Desktop CO2 Laser Cutter assessment – – Popping open the again to examine the laser tube
The setup consists principally of doing just a few fast checks to make sure your gantry and laser head transfer freely, confirming your laser tube is not cracked, filling your reservoir with purified (or distilled) water and antifreeze, and attaching your exhaust hose.
Accessing the reservoir tank is finished by eradicating eleven screws, popping off the again cowl, and unscrewing the cap to the tank. Whereas xTool does not furnish the distilled water you will want, it does give you antifreeze and a helpful funnel.
When including the antifreeze, you have to seek the advice of a helpful chart to determine how a lot so as to add. That is vital for those who plan to deal with your laser in unheated or under-heated workspaces like a storage or basement workshop.
As soon as you’ve got obtained your fluids within the machine, it is time to get calibrating. I used to be anticipating calibration to be an actual nightmare — kind of the identical approach that calibrating a 3D printer could be arduous — but it surely wasn’t. I assume a few of this was luck, as my P2 did not require a whole lot of fussing. Nonetheless, calibrating a laser cutter is much less fiddly than a 3D printer.
You may want to attach your machine to a pc through USB to calibrate. There is not any approach round this, which implies for those who’re a desktop consumer, it would be best to transfer your desktop briefly into your workspace, even for those who plan on utilizing the gadget wirelessly together with your iPad.
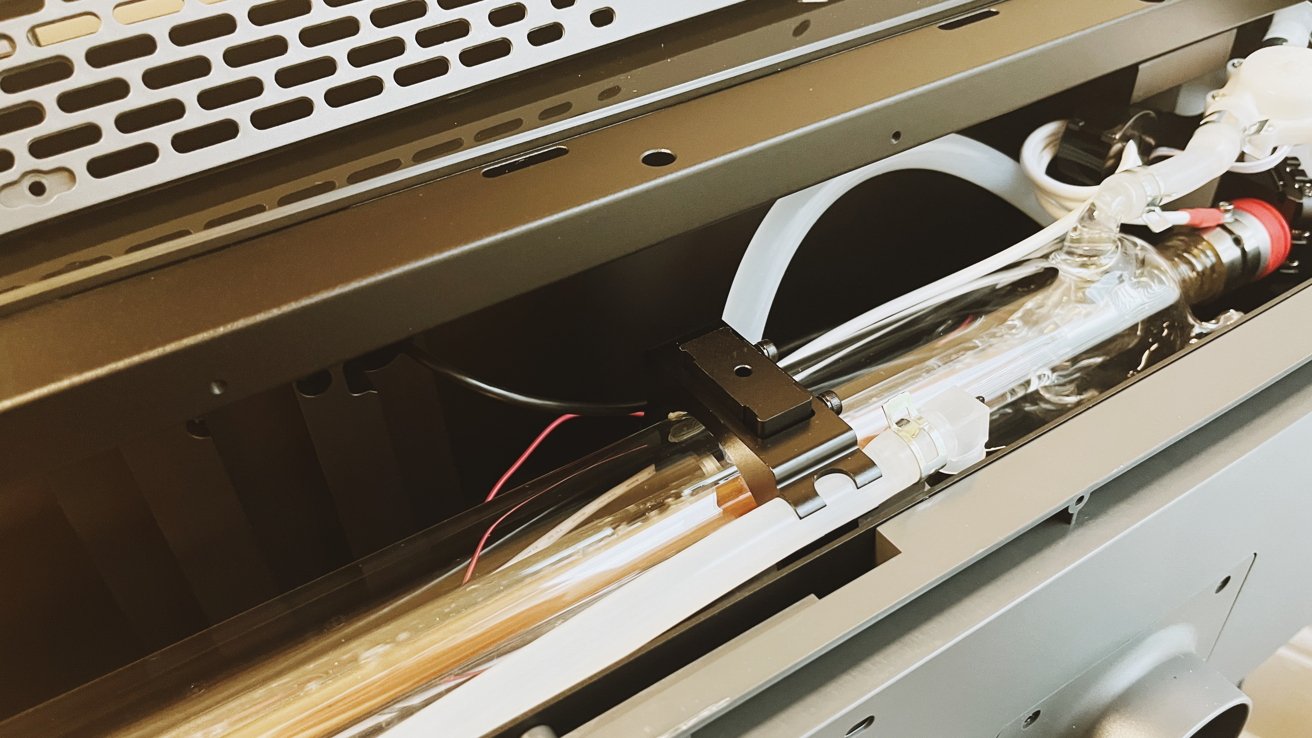
Utilizing xTool Inventive Area, you merely set your laser head to the decrease proper nook. Then, apply a masking tape over the opening on the laser head. Shut the lid of your laser, pulse a couple of times — not too many instances, as you’ll be able to set the tape on hearth — and see the place your mark lands.
xTool P2 Laser assessment – Calibrating the laser entails making an attempt to not mild a bit of masking tape on hearth
You are good if it hits inside 3mm of middle on the opening. If not, you’ve got obtained some fiddly work forward. You may must seize the included screwdriver and hex key and alter your mirror till you will get your laser to burn a gap in the course of the tape.
Fortuitously, xTool has an incredible video that reveals what you will must do for those who deviate exterior that vary.
Mine was barely off-center — undoubtedly inside the 3mm vary — , however I nonetheless fussed with it a bit to see if I might get it even nearer to the middle. It took me about three minutes in whole to get the outcomes I needed, bringing the entire setup time — not together with breaks — to underneath 20 minutes.
Earlier than I get into the precise product, I wish to discuss xTool Inventive Area, or XCS for brief. XCS is the software program that xTool has designed for use along side its merchandise for calibration and creating tasks.
I used to be blown away by how straightforward XCS is to make use of, no matter whether or not I used to be utilizing it on my iMac or iPad. It has a quite simple interface that’s intuitive to make use of.
xTool P2 Laser assessment – Laying out a minimize file in xTool Inventive Area on iPad
As a result of I’ve some expertise with 3D printer, design, and CAD software program, I did not really feel like I wanted to lookup any tutorials. Nonetheless, do you have to want further assist, the web is filled with tutorials for utilizing XCS, together with many from xTool.
Beginning a mission is as straightforward as snapping an image of the supplies in your mission mattress with the xTool digital camera. Then, you drag your mission file into it, place it on the fabric, and ensure your settings are appropriate. Adjusting settings is finished simply inside the right-hand sidebar.
After that, you simply must press course of, begin, after which hit the button in your xTool P2 — that is it.
In order for you, you’ll be able to even design tasks in XCS, although the instruments is usually a little rudimentary. I discovered that it’s a bit simpler to design in Adobe Illustrator or related program, save out as a .SVG, and import into XCS.
You are not beholden to XCS, both. Like many 3D printers, xTool lets you use different software program to function their machines. Many individuals are very loyal to Lightburn, however within the curiosity of transparency, I by no means bothered to make use of it. I discovered XCS greater than ample for my wants.
You is perhaps questioning what you are able to do with the xTool P2 — and rightfully so. In keeping with xTool, you’ll be able to minimize and engrave paper, wooden, acrylic, leather-based, cardboard, MDF, felt, and rubber — however this is not an exhaustive checklist.
I personally have tried wooden, paper, chipboard, cardboard, and acrylic throughout my check. Nonetheless, a fast scouring of the web reveals you too can minimize and engrave cloth, slate, mylar, marble, tile, and glass.
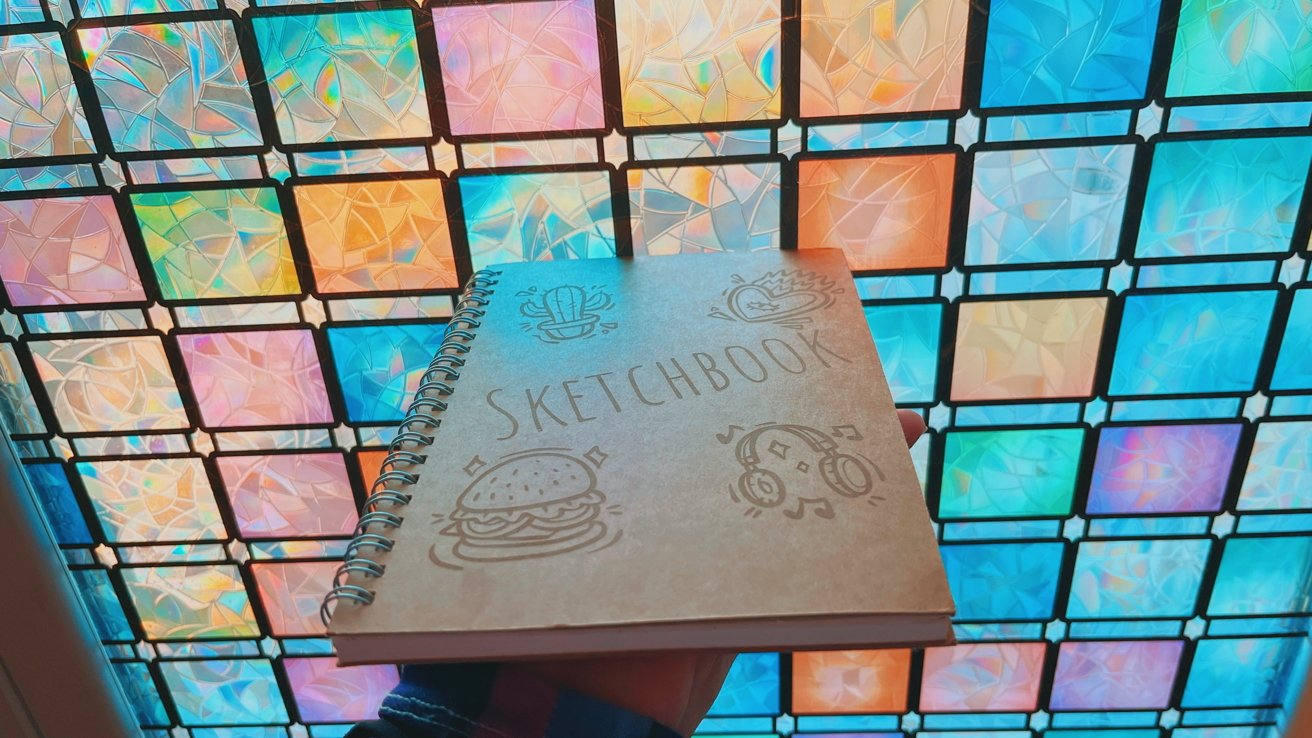
xTool P2 Laser assessment – Engraving on the entrance of a chipboard pocket book
Nonetheless, it is price noting that there are some things you can’t minimize with any CO2 laser, P2, or different.
Don’t try to engrave or minimize galvanized metals, as they’re coated in zinc. When heated, zinc off-gasses a really poisonous fuel.
Chopping most plastics will not work, both. Not solely do they soften slightly than minimize cleanly, however additionally they are inclined to catch hearth. ABS, HDPE, and polycarbonate can’t be used with laser cutters. Moreover, PVC off gasses harmful chlorine fuel which isn’t solely hazardous to anybody who breathes it in, additionally it is corrosive to metallic, which is not good in your machine.
xTool Smoke Air purifier
Laser chopping goes to create smoke, which you will must take care of. The most affordable option to take care of that is merely to toss your exhaust hose out of your window. When you’ve got a everlasting location in your machine, you would possibly wish to add a wall vent.
These aren’t the one choices, although — you too can look into shopping for a devoted air filter. xTool was good sufficient to ship its smoke air purifier — or air filter — alongside the P2.
The smoke air purifier is a PC-tower-sized field you hook as much as your vent. It has a three-stage filter system that pulls the air out of your laser by means of the highest and out by means of the entrance.
It is extremely easy — there is a knob on the aspect that controls how a lot suction the filter makes use of, an influence swap on the again, and a lid to tug out and change your filters as wanted.
Setup is tremendous straightforward, too. You simply connect the vent hose out of your laser cutter to the highest of the air filter, tighten the metallic bracket across the hose, and also you’re performed. If you want, you’ll be able to even vent the purified air through a second hose, do you have to determine to.
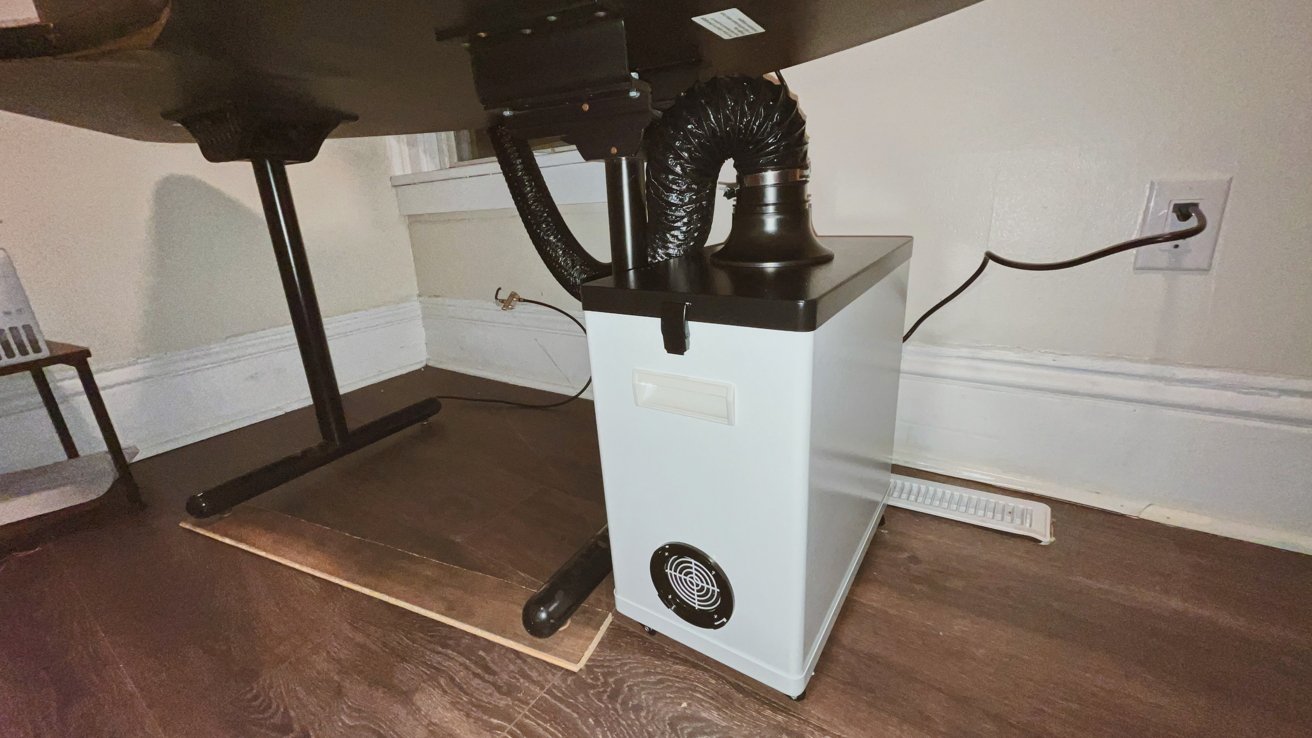
xTool P2 Laser assessment – The Smoke Air purifier underneath the laser desk
The highest layer of the filter is designed to seize massive particles. This layer is washable and goes to get the dirtiest first.
The second layer is a HEPA honeycomb construction that xTool says filters out 99.97% of 0.03m particles. The third layer is an activated carbon filter. This layer is designed to soak up dangerous gasses and ugly odors.
How usually you modify your filter will significantly depend upon how usually you run your laser and what you are chopping. There is not something on the filter itself to inform you when it must be modified — no lights, no little show — so you will must depend on a spot examine of the highest filter.
I believed the smoke air purifier labored fairly properly. It is loud however not deafeningly so, and definitely not a lot louder than the P2 itself. I had already resolved to put on listening to safety across the laser- it by no means hurts to be overly cautious- so I wasn’t too bothered. That mentioned, I would not run it whereas the youngsters are napping or for those who plan on taking an vital telephone name the following room over.
The smoke air purifier shouldn’t be an inexpensive accent by any means — at $800, it’s a appreciable funding. Alternative filters aren’t low cost, both — it prices $136 to exchange all three filters.
Nonetheless, for those who can’t externally vent your laser in your workspace or wish to scale back the quantity of dangerous emissions your laser makes, it is not a foul thought to select one up.
As soon as I obtained the whole lot arrange, which once more — solely took me a couple of half hour — I used to be prepared to start out my first mission. I made a decision to start out with one thing fairly easy — a set of picket coasters.
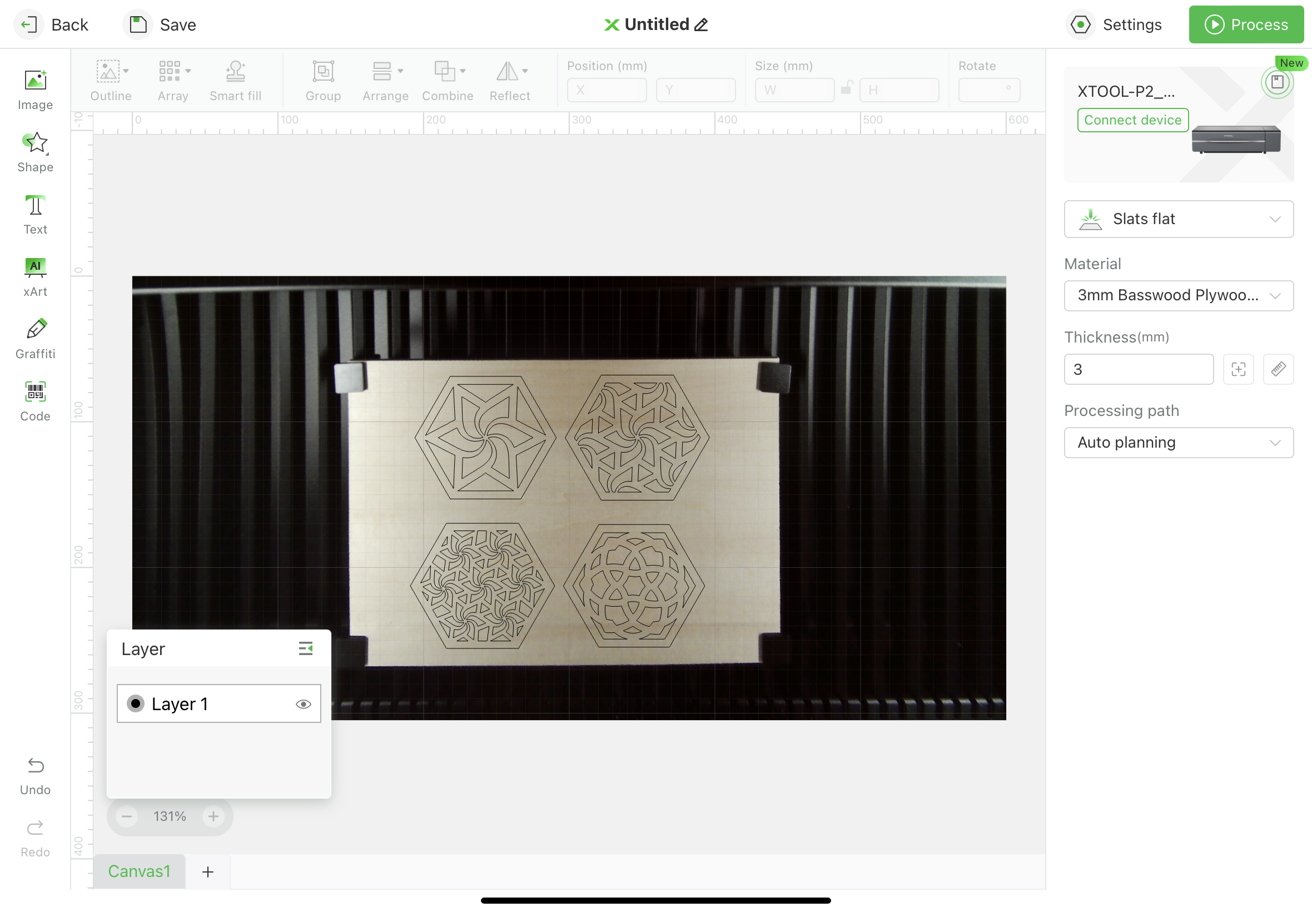
I opened up xTool XCS, and the P2 mechanically despatched me an image of the chopping mattress. This allowed me to see precisely the place to put my minimize information.
I’ll say that as a result of it’s a wide-angle lens, there is a tiny little bit of distortion. For many tasks, this is not going to be an issue.
However, for those who’re doing cuts that want a whole lot of precision — say, for those who’re utilizing materials that you have already minimize shapes from earlier than — you’ll be able to select a precision snapshot that makes use of the digital camera hooked up to the pinnacle of the laser.
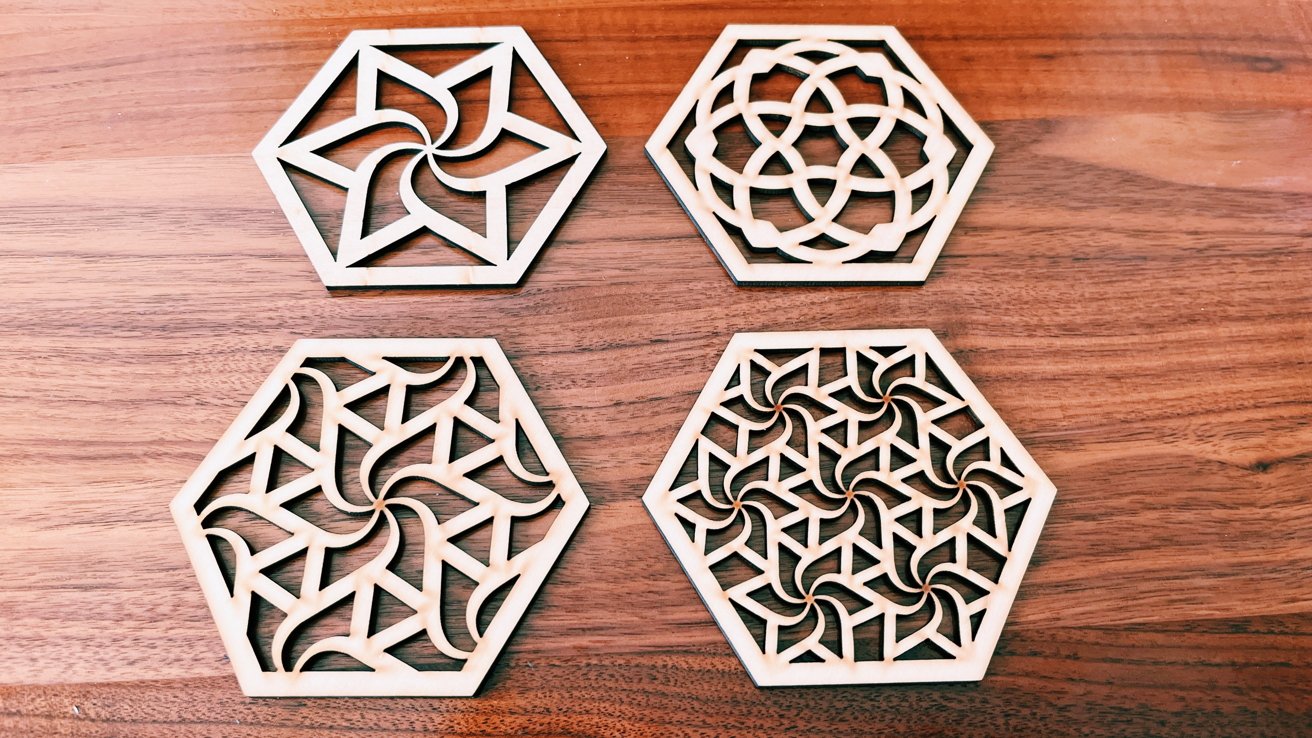
xTool P2 Laser assessment – Because it seems, a laser cuts 3mm basswood very, in a short time
As soon as I had a transparent image of the 3-millimeter basswood I needed to chop, all I needed to do was drag my minimize file, an .SVG, to the fabric, place it how I needed, and press course of. Then, after urgent “begin,” I simply needed to hit the shiny silver button on the P2.
From begin to end, the 4 picket coasters solely took a few minutes to chop. The laser shortly labored on such a posh mission — I used to be considerably shocked. Because it seems, chopping may be very, very fast.
My subsequent mission was one I would needed to do for some time. I needed to make just a little keychain of a cease signal. So, this time I headed to Adobe Illustrator, designed a cease signal, and imported it into XCS. After a fast search of learn how to correctly engrave acrylic, I arrange a multi-step engrave-and-cut mission.

xTool P2 Laser assessment – engraving clear acrylic ends in a neat frosted glass impact
I hit the massive silver button on the P2, and 7 minutes later, I had my keychain. The frosted impact was unimaginable, and I marveled on the precision.
From there, I minimize and engraved many issues: geometric jewellery, a coffin-shaped trinket field, a picket jewellery stand, some acrylic lights, and extra. Each time, I used to be impressed with the pace and precision of the machine.
That being mentioned, that does not imply I did not have failures. The failures appeared apparent in hindsight, however hindsight is 20/20, so I will not fault myself too badly there.
I had initially needed to make a puzzle out of basswood for my dad. I began the mission by engraving an AI-generated picture of a canine I created in XCS. The engraving took about 45 minutes as a result of it was very detailed.
After it was completed engraving, it started the minimize — and that is the place I would actually screwed up. You see, the xTool P2 comes with a slatted base, which simply so occurred to be concerning the width of a puzzle piece.

xTool P2 Laser assessment – Errors have been made
When the laser started chopping, items fell by means of the slats to the ground of the laser mattress and have been shortly ignited by the laser because it repeated passes over the identical space.
Sure, I began a small hearth three or 4 tasks in. Nonetheless, the hearth went out once I turned off the laser. So, to its credit score, the machine does a reasonably good job of not permitting small flames to get out of hand shortly. That being mentioned, holding a fireplace extinguisher close by is a brilliant thought.
I additionally realized that even when sanded, acrylic does not adhere to itself very properly with normal CA glue. Because it seems, you want particular glue that successfully welds the acrylic to itself.
My final lesson was one I ought to have in all probability predicted getting into. Nonetheless, in my pleasure to start a residing hinge mission, I scaled down my ebook field mission to suit inside a sheet of basswood. The problem was that I did not notice that scaling it down additionally scaled down the holes, which have been correctly sized for a 3-millimeter materials thickness.
So, after I used to be performed, I realized that each gap in my mission was now about 1.5mm too small for the tabs. Whereas this was annoying, it was fixable and required me to take rotary instruments and hand-widen the slots. So, not my most interesting second, however actually not sufficient to show me off of laser chopping.
Once I began this assessment, I struggled with recommending a product that prices north of $4,000. That is a substantial price, particularly for those who’ve not delved into laser chopping already.
Nonetheless, it is onerous not to suggest the P2, too. As somebody who all the time dreamed of utilizing a laser cutter however had zero expertise, I am unable to say sufficient constructive issues about it.
I’ve solely spent just a few weeks with it, however I’ve already obtained family and friends asking if they’ll pay me to chop tasks for them. I have already got Mom’s Day and Father’s Day presents deliberate out. I’ve already give you dozens of concepts for tasks I am unable to wait to start out on.

xTool P2 Laser assessment – An engraved acrylic lamp
A fast journey to Etsy reveals that the typical price of a laser mission file is underneath $5. Supplies, whereas not grime low cost, aren’t terribly costly, both. After I blew by means of the acrylic sheets xTool supplied, I replenished my inventory with 40 new sheets for $31.
In the end, for those who’re out there for a laser cutter and have the house for it, the xTool P2 is unbelievable. That is very true for those who plan on utilizing it to create tasks you will promote. I might see the xTool paying for itself — and its repairs — very quickly flat.
You may snag the xTool P2 55W Desktop CO2 Laser Cutter from xTool’s web site for a limited-time value of $4,299, which is down from its common value of $4,999. It is available in Area Grey and Pearl White.
Alternatively, xTool through Amazon shares the P2 55W Laser, however for $100 extra at press time.
Score: 4 out of 5
A phrase about rankings: It may be troublesome to assign a easy score to sure objects — I might argue that this product can be nearer to a 3 for a median crafter and a 5 for somebody who plans on creating a component or full-time gig out of laser chopping.
In the end, I selected to offer it a 4 out of 5 due to its versatility and ease of use juxtaposed with its excessive price and huge dimension.
- Quick setup time
- Enclosed system
- Newbie pleasant
- Twin digital camera system
- 55W laser able to chopping thick supplies
- Loads of add-ons to develop capabilities
- Costly startup price
- Requires exterior venting or devoted air filter for a further $800 buy
- Massive dimension might restrict the place you’ll be able to place it

Mivi DuoPods A750 True Wireless Earbuds, Multi Device Connectivity, Metallic Finish, 55+ Hrs Playtime, 13MM Drivers, IPX 4.0, Type C Charging, AI-ENC for Call Clarity, Made in India - Black
₹1,199.00 (as of February 10, 2024 21:32 GMT +00:00 - More infoProduct prices and availability are accurate as of the date/time indicated and are subject to change. Any price and availability information displayed on [relevant Amazon Site(s), as applicable] at the time of purchase will apply to the purchase of this product.)
TECNO Spark GO 2024 (Mystery White,8GB* RAM, 128GB ROM)| Segment First 90Hz Dot-in Display with Dynamic Port & Dual Speakers with DTS| 5000mAh| 10W Type-C| Fingerprint Sensor| Octa-Core Processor
₹7,299.00 (as of February 10, 2024 21:32 GMT +00:00 - More infoProduct prices and availability are accurate as of the date/time indicated and are subject to change. Any price and availability information displayed on [relevant Amazon Site(s), as applicable] at the time of purchase will apply to the purchase of this product.)
Redmi 13C 5G (Starlight Black, 4GB RAM, 128GB Storage) | MediaTek Dimensity 6100+ 5G | 90Hz Display
₹10,999.00 (as of February 10, 2024 21:32 GMT +00:00 - More infoProduct prices and availability are accurate as of the date/time indicated and are subject to change. Any price and availability information displayed on [relevant Amazon Site(s), as applicable] at the time of purchase will apply to the purchase of this product.)
realme Buds 2 Wired in Ear Earphones with Mic (Blue)
₹599.00 (as of February 10, 2024 21:32 GMT +00:00 - More infoProduct prices and availability are accurate as of the date/time indicated and are subject to change. Any price and availability information displayed on [relevant Amazon Site(s), as applicable] at the time of purchase will apply to the purchase of this product.)
boAt Rockerz 255 Pro+ Bluetooth in Ear Earphones with Upto 60 Hours Playback, ASAP Charge, IPX7, Dual Pairing and Bluetooth v5.0(Cosmic Grey)
₹999.00 (as of February 10, 2024 21:32 GMT +00:00 - More infoProduct prices and availability are accurate as of the date/time indicated and are subject to change. Any price and availability information displayed on [relevant Amazon Site(s), as applicable] at the time of purchase will apply to the purchase of this product.)
Canon PIXMA PG47 Black Ink Cartridge
₹647.00 (as of February 10, 2024 21:32 GMT +00:00 - More infoProduct prices and availability are accurate as of the date/time indicated and are subject to change. Any price and availability information displayed on [relevant Amazon Site(s), as applicable] at the time of purchase will apply to the purchase of this product.)
Wayona Nylon Braided USB to Lightning Fast Charging and Data Sync Cable Compatible for iPhone 13, 12,11, X, 8, 7, 6, 5, iPad Air, Pro, Mini (3 FT Pack of 1, Grey)
₹399.00 (as of February 10, 2024 21:32 GMT +00:00 - More infoProduct prices and availability are accurate as of the date/time indicated and are subject to change. Any price and availability information displayed on [relevant Amazon Site(s), as applicable] at the time of purchase will apply to the purchase of this product.)
Dell USB Wireless Keyboard and Mouse Set- KM3322W, Anti-Fade & Spill-Resistant Keys, up to 36 Month Battery Life, 3Y Advance Exchange Warranty, Black
₹1,199.00 (as of February 10, 2024 21:32 GMT +00:00 - More infoProduct prices and availability are accurate as of the date/time indicated and are subject to change. Any price and availability information displayed on [relevant Amazon Site(s), as applicable] at the time of purchase will apply to the purchase of this product.)
Ambrane Unbreakable 3A Fast Charging 1.5m Braided Micro USB Cable for Smartphones, Tablets, Laptops & other Micro USB devices, 480Mbps Data Sync, Quick Charge 3.0 (RCM15, Black)
₹179.00 (as of February 10, 2024 21:32 GMT +00:00 - More infoProduct prices and availability are accurate as of the date/time indicated and are subject to change. Any price and availability information displayed on [relevant Amazon Site(s), as applicable] at the time of purchase will apply to the purchase of this product.)
amazon basics Type A to Micro USB Braided Cable | 3A/18W Fast Charging and 480 Mbps Data Transfer Speed | 1.2m, Tangle Free Cable
₹109.00 (as of February 10, 2024 21:32 GMT +00:00 - More infoProduct prices and availability are accurate as of the date/time indicated and are subject to change. Any price and availability information displayed on [relevant Amazon Site(s), as applicable] at the time of purchase will apply to the purchase of this product.)
SanDisk 1TB Extreme Portable SSD - Up to 1050MB/s, USB-C, USB 3.2 Gen 2, IP65 Water and Dust Resistance, Updated Firmware - External Solid State Drive - SDSSDE61-1T00-G25
$99.00 (as of February 10, 2024 21:32 GMT +00:00 - More infoProduct prices and availability are accurate as of the date/time indicated and are subject to change. Any price and availability information displayed on [relevant Amazon Site(s), as applicable] at the time of purchase will apply to the purchase of this product.)
Crucial Pro RAM 32GB Kit (2x16GB) DDR4 3200MT/s (or 3000MT/s or 2666MT/s) Desktop Memory CP2K16G4DFRA32A
$59.99 (as of February 10, 2024 21:32 GMT +00:00 - More infoProduct prices and availability are accurate as of the date/time indicated and are subject to change. Any price and availability information displayed on [relevant Amazon Site(s), as applicable] at the time of purchase will apply to the purchase of this product.)
ARCTIC MX-4 (incl. Spatula, 4 g) - Premium Performance Thermal Paste for all processors (CPU, GPU - PC, PS4, XBOX), very high thermal conductivity, long durability, safe application, CPU Thermal Paste
$5.38 (as of February 10, 2024 21:32 GMT +00:00 - More infoProduct prices and availability are accurate as of the date/time indicated and are subject to change. Any price and availability information displayed on [relevant Amazon Site(s), as applicable] at the time of purchase will apply to the purchase of this product.)
SAMSUNG T7 Shield 4TB Portable SSD - 1050MB/s, Rugged, Water & Dust Resistant, for Content Creators - Black
$249.99 (as of February 10, 2024 21:32 GMT +00:00 - More infoProduct prices and availability are accurate as of the date/time indicated and are subject to change. Any price and availability information displayed on [relevant Amazon Site(s), as applicable] at the time of purchase will apply to the purchase of this product.)